Render a 3D Model Screenshot with AI, No Plugin
By Inkfinish · · 7 min read
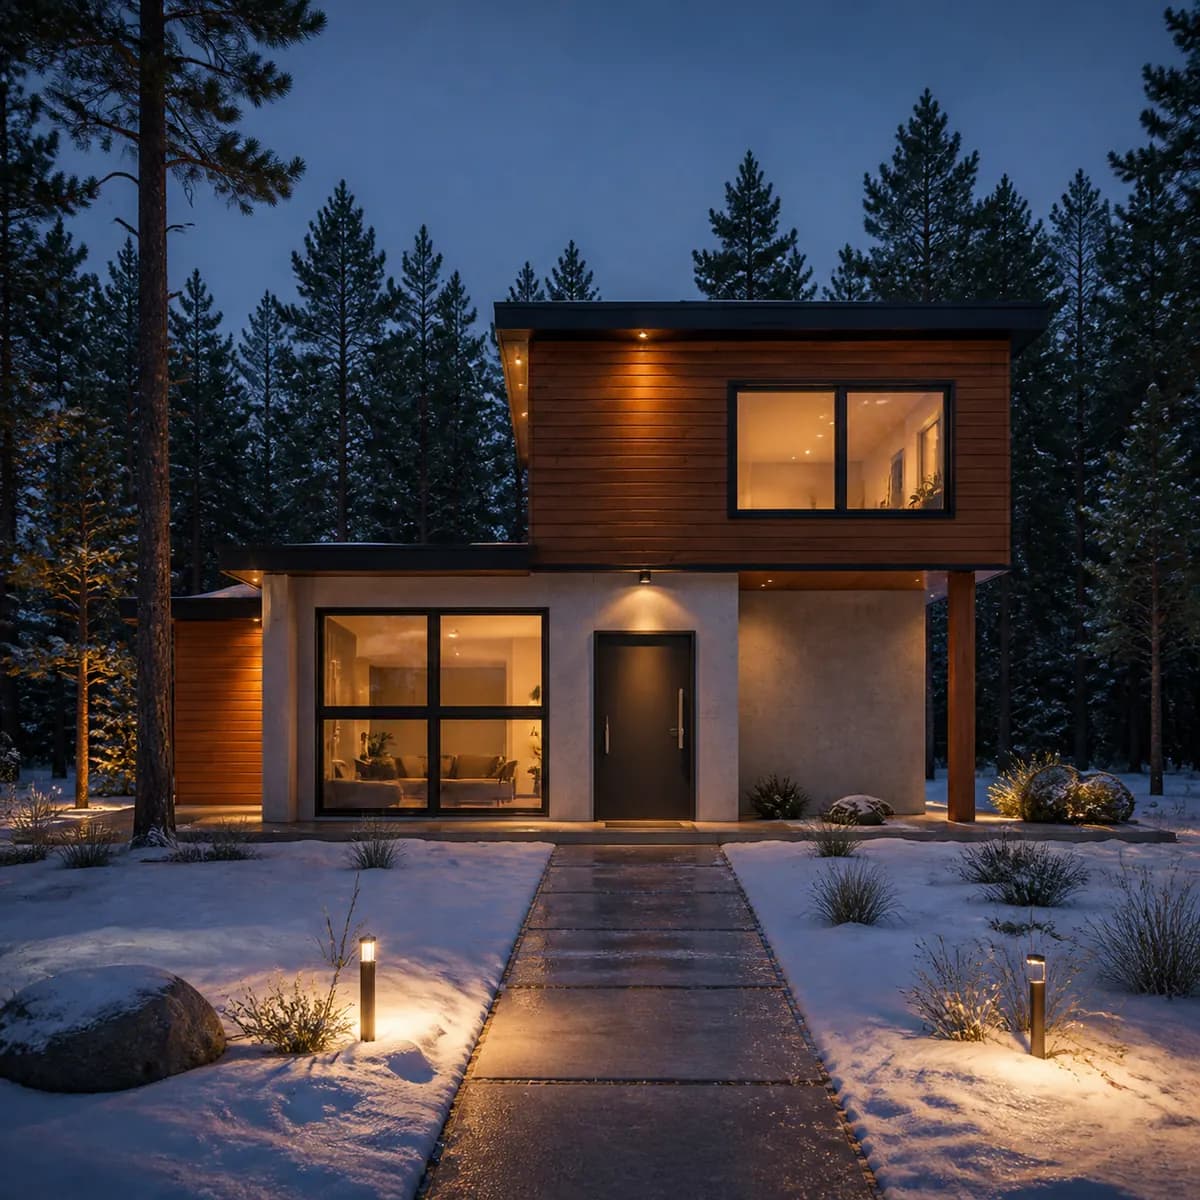
You have a model that is right, and a meeting where it needs to look like a building rather than a white study model. You can render a 3D model screenshot with AI without exporting a scene, assigning materials or installing a plugin: take a screenshot from your modeler, upload it in the browser, say what the building is made of, and Inkfinish returns a photoreal render in about 30 seconds. Then the line check shows you how much of the model's linework the render kept.
The screenshot does most of the work, so most of this post is about taking a good one.
Why a screenshot is enough
A renderer guided by an image does not need your model file. It needs what the screenshot already carries:
- Edges. Every visible edge is a line the render is asked to keep: eaves, parapets, reveals, mullions, the line where the building meets the ground.
- Perspective. Your modeler's camera becomes the render's camera: horizon, vanishing points and lens.
- Openings and massing. Where the glass is and how the volumes stack are read straight from the image.
What a white model does not carry is material. That comes from your description. The screenshot says what shape; the words say what finish.
Because the input is a picture, any modeler that shows a perspective view will do, on any machine. The upload works from a phone as well.
How to render a 3D model screenshot with AI: the screenshot checklist
Most of these take a minute in any modeler.
Camera
- Use a perspective camera. A parallel-projection view still renders, but it reads as a flat elevation.
- Put the camera at eye level, around 5 to 5½ feet above the ground, unless you mean an aerial view.
- Keep verticals vertical. Turn on two-point perspective if your modeler has it. The Building exterior subject keeps verticals straight best when the screenshot starts that way.
- Avoid very wide angles. Stretched corners at the edge of the frame are geometry too, and the render keeps them.
Clean the viewport
- Hide the grid, the axes and the origin marker, and any ground-plane color that is not meant to be ground.
- Hide section planes, guides, dimensions, text tags, selection highlights and the cursor.
- Crop out toolbars, panels and the window frame. Upload the viewport only.
- Remove placeholder textures you do not mean. A default checker or a stock wood is a material hint the render may follow.
- Scale figures can stay. The only uploads turned away are ones where a person is the main subject.
Edges and shading
- Turn edge display on, with thin dark lines. Edges are what the render follows and what the line check compares.
- Consider turning shadows off. The line check treats any strong change of tone as a line, so a cast shadow counts as one. A render with different light moves it, and that shows up as red that has nothing to do with your geometry.
- Plain white or light gray faces are best.
Framing and file
- Fill most of the frame with the building, and leave a margin. A render does not always come back at your screenshot's shape (one of our square sample sketches came back 3:2).
- Add context only if you want it rendered. Neighboring massing, a kerb line, a tree marker: anything in the frame will become something.
- Save as PNG, JPEG or WebP, up to 10 MB. Uploads are scaled to 2,048 pixels on the long edge, so a screenshot around that size is plenty. A 4K capture adds nothing.
Describing a white model: name every material
Name materials in the order you would read the building: base, walls, roof, openings, ground, then light and setting.
For a two-story white model, a description might read:
Board-formed concrete ground floor, vertical larch cladding above, dark bronze window frames, flat roof with a thin metal fascia, gravel forecourt, birch trees, overcast soft light
That is an example to type, not a render shown here. A few rules:
- Name a material for every surface you care about. If you leave the roof out, the render chooses one.
- Choose one light condition. Our night house below was described with both "late afternoon sun" and "night", because idea chips were added to a description that already had light in it. The model picked night.
- Do not describe shapes. "Two stories with a cantilevered upper floor" is already in the screenshot. Words about shape can only repeat the image or argue with it.
- Subject. Pick Building exterior, or leave "Choose for me". It looks at what the image shows before it reads your words, so a screenshot of a house will normally land on Building exterior.
There is more vocabulary, subject by subject, in how to write a render prompt for materials and light.
The result, and checking that the geometry held
About 30 seconds after you press Render, the image appears beside your screenshot with a handle to drag between them, and a line check: "N% of your lines kept". "Show lines" draws your screenshot's lines over the render, blue where the render has a line in the same place, red where it does not.
How to read it for a model:
- Red along a parapet, an eave or a window head is what to look at first. That edge may have moved or gone.
- Red across a face you shaded or textured usually means a tone became a material, not that the wall moved.
- The line check's bands are prompts, not grades. At 85% or above there is no warning; from 45% to 84% it asks you to check the red ones; below 45% it says parts may have changed. No score is promised.
We have no model screenshot among our published examples yet, so here is the same check on a line drawing of a house. It reads the same way.
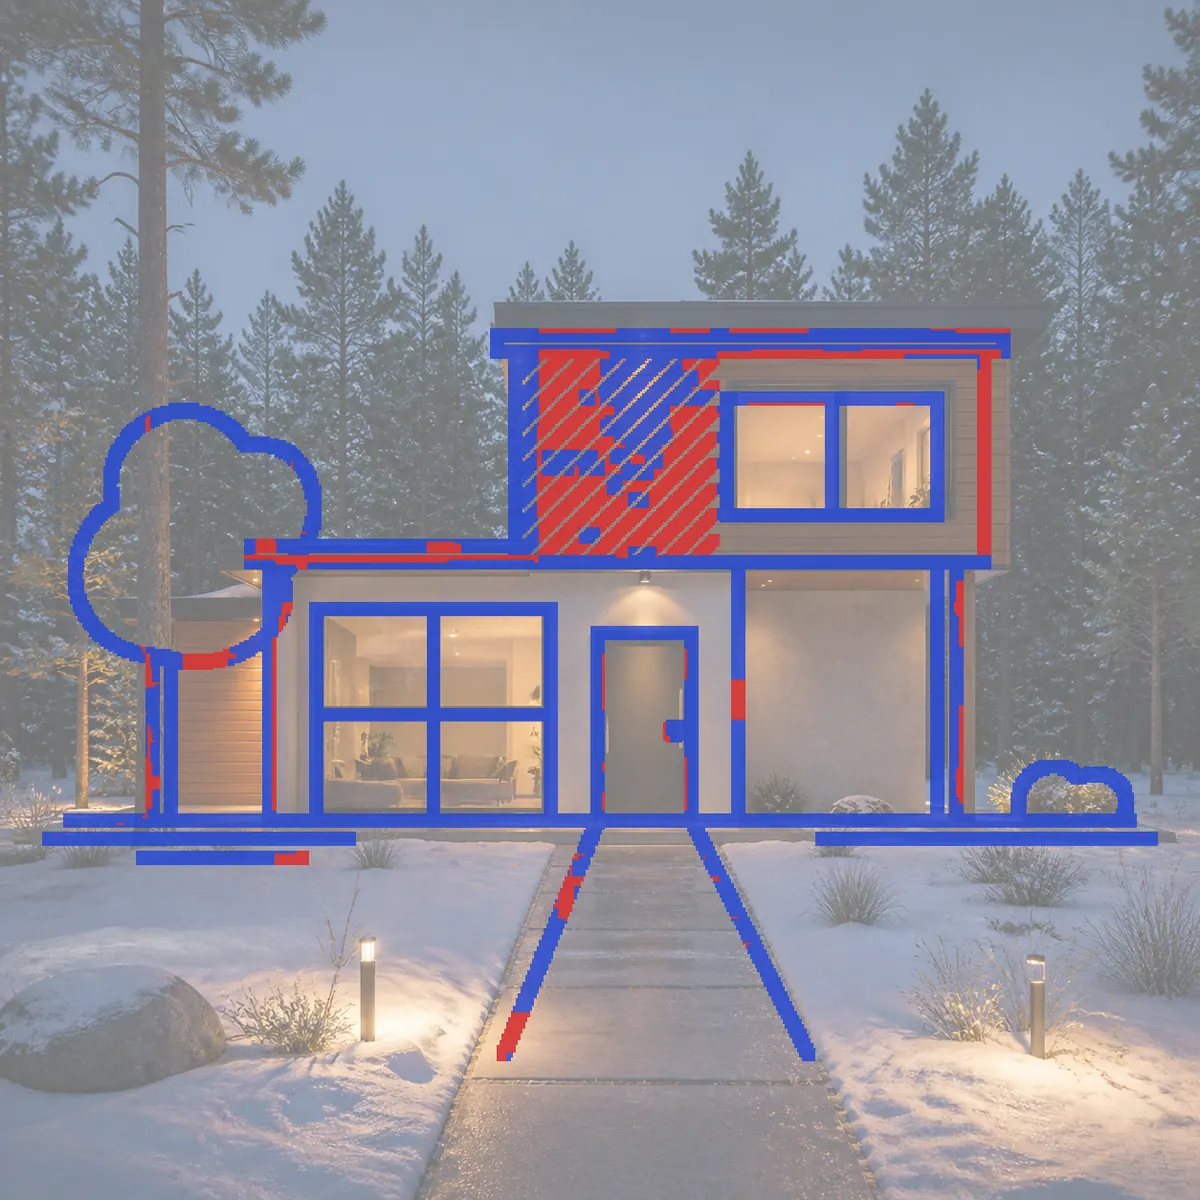
Most of the red sits inside the hatched upper block, where the hatching became cedar boards. That is a material, not a moved wall. The overlay also has a blind spot worth knowing: blue means the render has an edge near that line, not that it is the same object. In this render the round tree we drew became a pine, and its outline still reads mostly blue because the forest behind puts edges near everything. Drag the compare handle as well. More on this in does AI rendering keep your design?.
A second material scheme from the same screenshot
Send a follow-up message in the same design with the new materials. It renders the same screenshot, your new words win where they differ from the first brief, and the result is a new version below the first. Nothing is overwritten, and you can go back to any version.
A second scheme for the same model might be:
White lime render, pale oak windows, clay tile roof, low stone wall, warm late-afternoon light
Each render costs 5 credits, and failed renders are refunded. Compare the two line checks too: if one scheme moved an edge the other kept, the red shows where.
If only one part is wrong, such as an entrance door or a missing tree, use "Change just this": mark that part, say what goes there, and only the area around your marks is redrawn. It also costs 5 credits. The tutorial shows Change just this step by step.
When a plugin tool is the better choice
A tool that runs inside your modeler does things a screenshot cannot:
- Live sync. It re-renders as you orbit or edit. With a screenshot, every change to the model means a new screenshot.
- Many matched views. A tool that reads the model's material assignments keeps ten views consistent. Descriptions typed per screenshot vary a little from image to image.
- Materials you already mapped. If your model is fully textured, a plugin can use those materials directly.
- Outputs we do not make: animation, walkthroughs, 3D output, upscaling to very large sizes.
For one or two strong images of a view, on any machine, today, with nothing to install, a screenshot is enough.
You can also skip the screenshot. Export the model as GLB, OBJ, FBX, STL, 3MF or DAE, add the file in the studio, turn it to the view you want, and render that view. The "Lines" style shows it as a plain white model with its edges drawn, which follows the checklist above for you. The model stays on your computer; only the view is uploaded. Students will find more in AI rendering for architecture students.
Limits
- One view at a time. Hidden sides and rooms behind the glass are invented.
- Materials are interpreted, not specified. "Larch" gives a larch-like timber, not a product you can order.
- Small details may change. Thin mullions, railings and downpipes can be simplified. Zoom into the overlay.
- Plants are approximate. Species are not reliable.
- Not documentation. No plans, sections, dimensions or anything to build from.
- Free renders carry a watermark. Sign in with a Google account and your first 3 renders are free.
If a model is open now, test the view you would show a client anyway: hide the grid, set the camera at eye level, turn edges on and name the materials. The complete sketch-to-render guide and the step-by-step tutorial cover the rest. When the screenshot is ready, upload a screenshot, render it free.