Sketch to Render with AI: A Practical Guide
By Inkfinish · · 10 min read
A sketch to render AI tool takes a drawing you already have, whether a pencil perspective, a tablet sketch or a screenshot of a massing model, and returns a photoreal image of the same design with materials, light and a setting. In Inkfinish that takes about 20 seconds. Whether the result looks impressive is the easy question. The useful ones are whether it kept your design, how you would know, and what it costs to try again. This guide answers them with real renders made from our own sample sketches, with every prompt shown as it was typed.
What "sketch to render" means
Rendering used to mean building a 3D scene, assigning materials, placing lights and waiting. Sketch to render skips the scene. You give the tool an image that already fixes the design, add a sentence about the finish, and it paints the finish onto that design.
The image can be any of these:
- A paper sketch. Photograph it flat, in even light, and crop to the drawing. Pencil and pen both work; dark, confident lines read more reliably than faint ones.
- A tablet drawing. Export it as a PNG or JPEG. Clean digital lines are the easiest input there is.
- A 3D-model screenshot. A white, untextured perspective view from SketchUp, Rhino, Revit or any other modeler. No plugin is involved; it is just an image. Rendering a 3D model screenshot without a plugin covers how to frame the shot.
- A photo of the real thing. An existing facade, a room before a remodel, a back garden. The photo sets the geometry and your description changes the finish.
You can also start from a description alone, with no image. That is useful for early mood studies, but nothing holds the geometry, so there is nothing to check the result against.
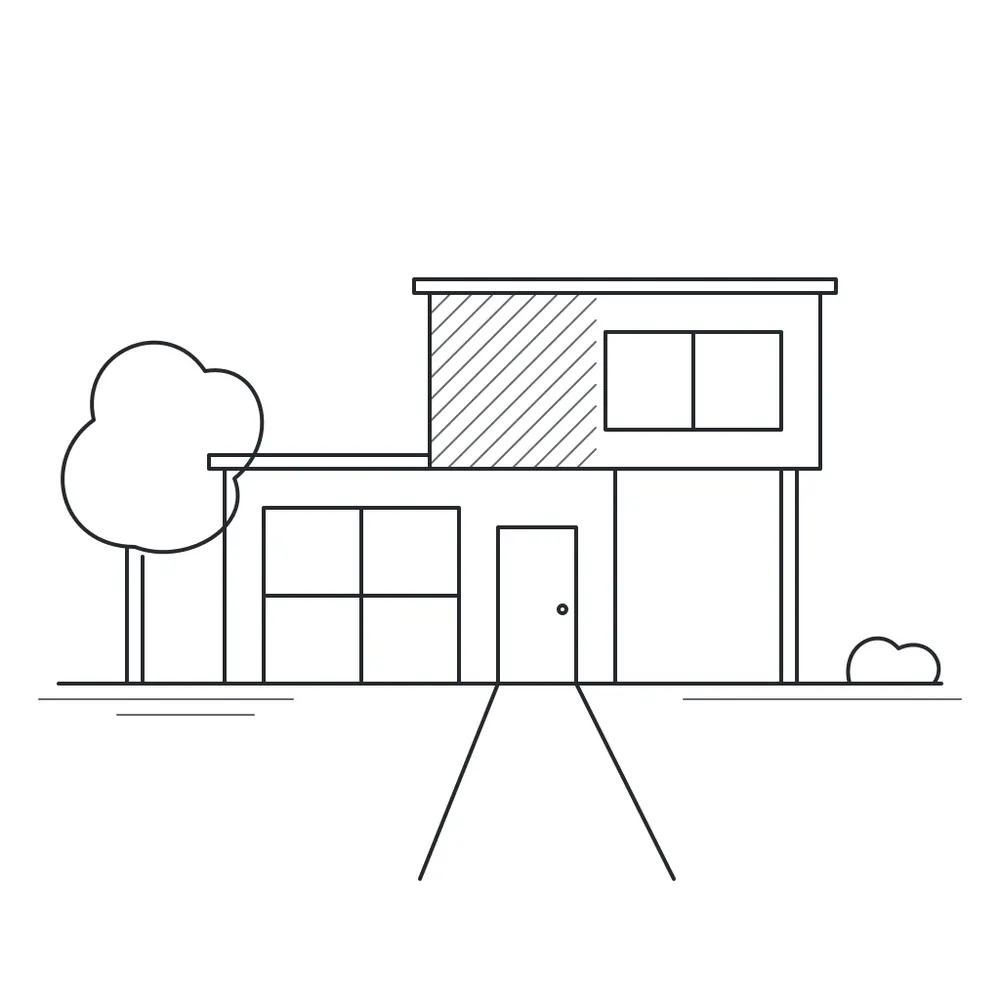
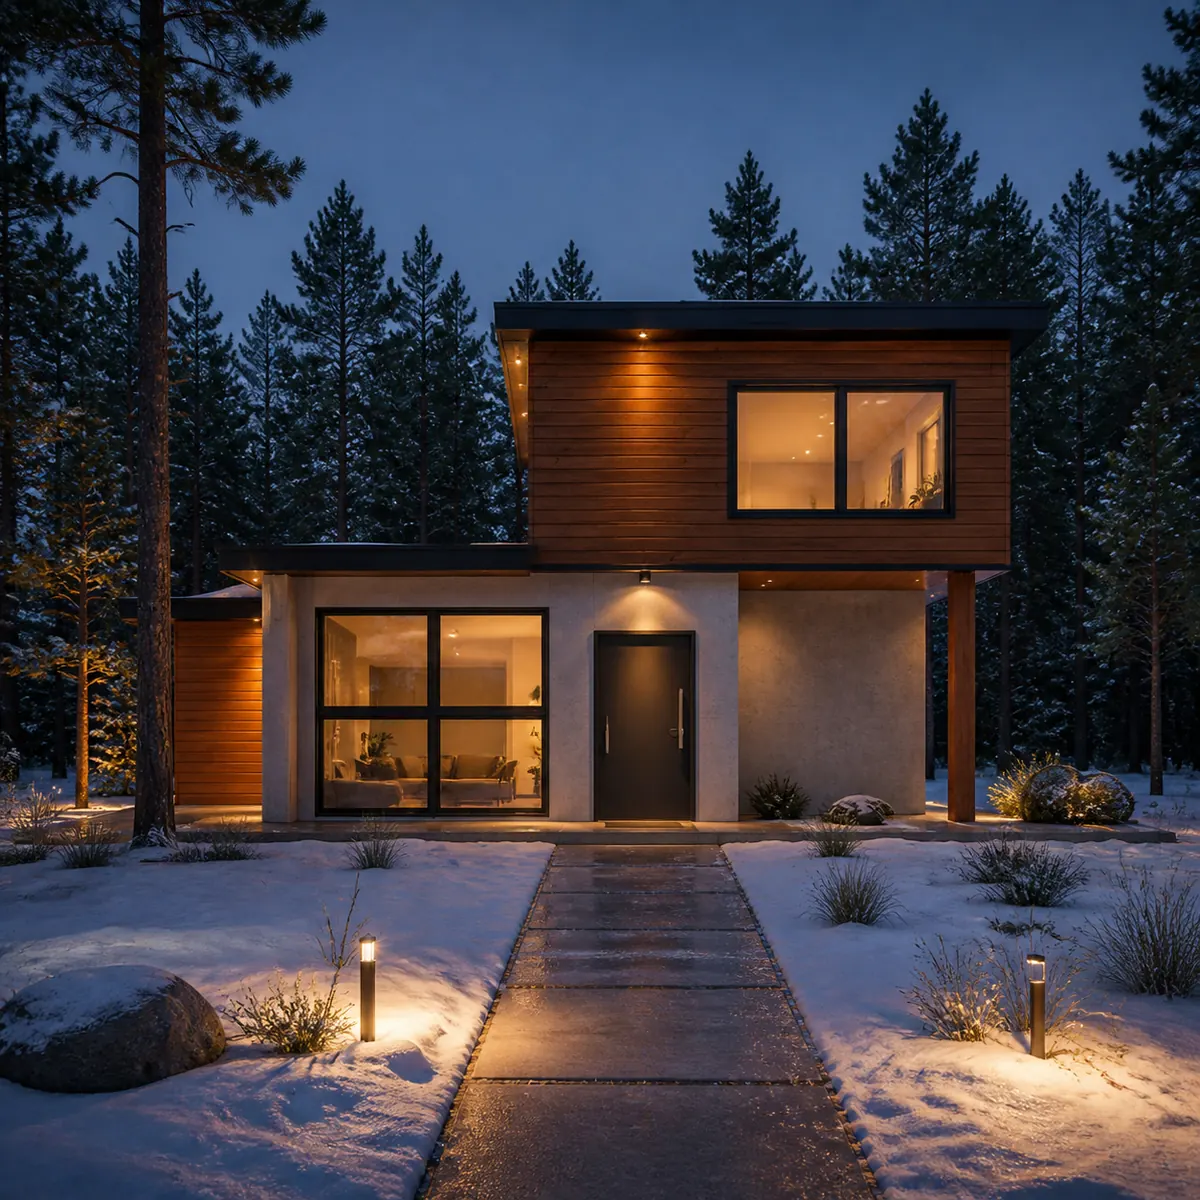
Uploads can be PNG, JPEG or WebP files up to 10 MB. Everything runs in the browser, phones included, so the shortest path from a napkin sketch to a render is often the camera already in your pocket. The step-by-step tutorial shows each screen, and you can follow along in the studio as you read. For one house sketch taken all the way through, with every version, see a house sketch, start to finish.
What sketch to render AI must keep from your drawing
A render is only useful to a designer if it is still your design. For a building, that means four things:
- Massing. The volumes you drew, arranged the way you drew them, overhangs included.
- Proportion. A window a third of the facade wide stays a third wide. A roof that sits low stays low.
- Openings. Doors and windows where you put them, at the size you drew them, with the mullion pattern you drew.
- Roofline and edges. The silhouette against the sky is the first thing a client reads.
Everything else is finish: what the walls are made of, the time of day, the planting, the weather. Finish is what you are asking the tool to invent. Geometry is what you are asking it to leave alone.
Image models do not always respect that line on their own. A model working from text alone invents structure freely. A model guided by your drawing is held by it, but it can still nudge an edge, merge two close lines, or read a hatch as a material. Whichever tool you use, check.
How to check: the line check
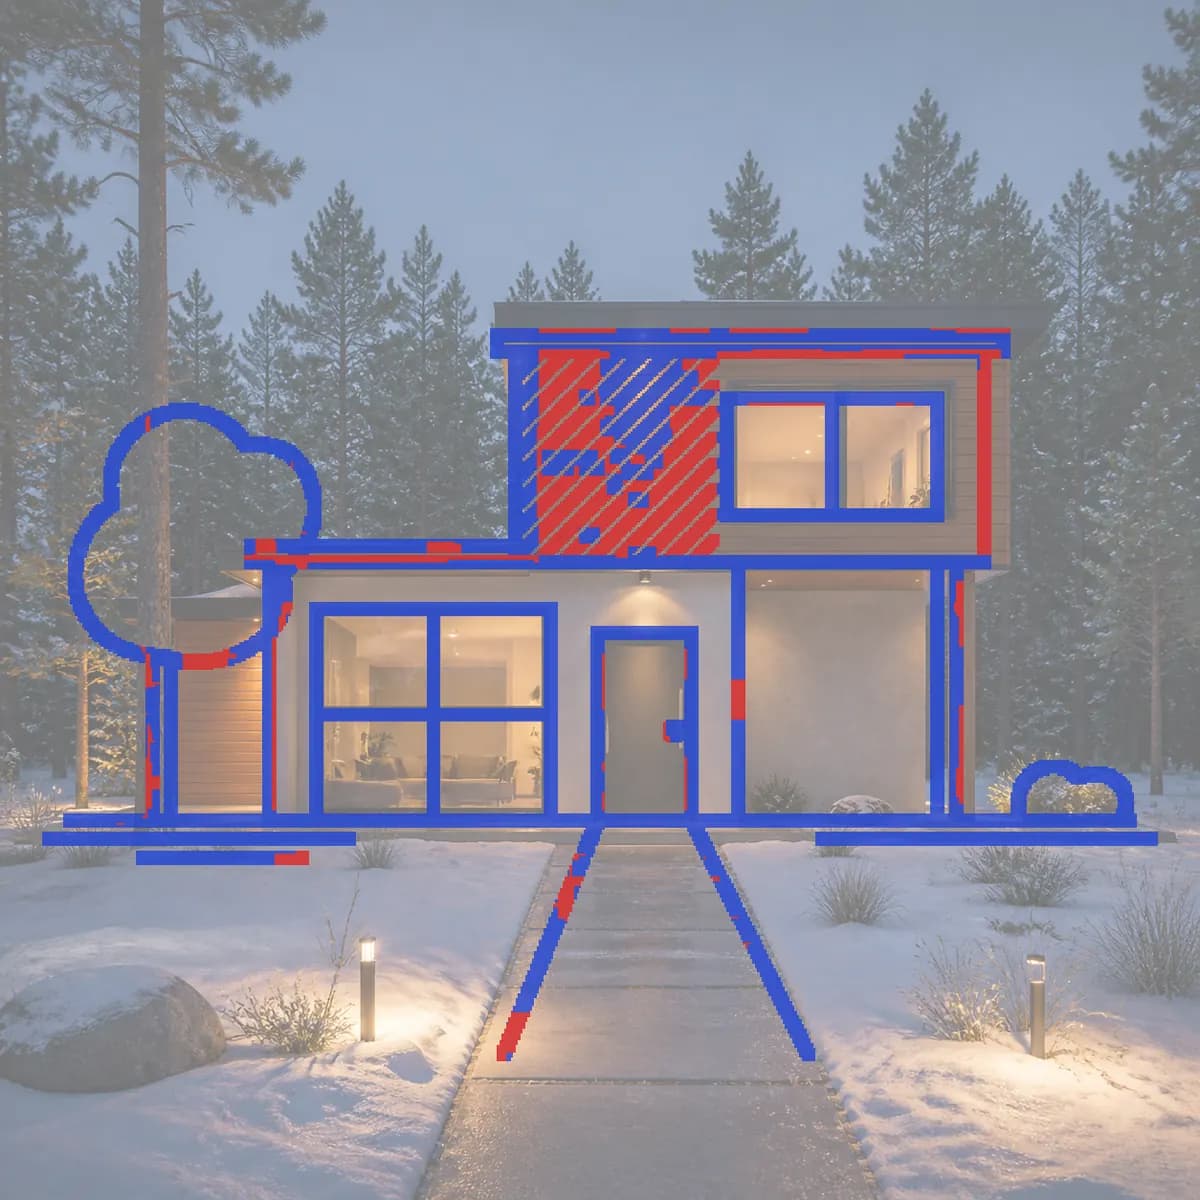
Inkfinish is built to keep your design and change only the finish. The line check is how you hold us to that. After each render, Inkfinish finds the lines in your sketch, looks for an edge in the render close to each one, and reports the share it found, such as "82% of your lines kept". Choose "Show lines" and it draws your sketch over the faded render: kept lines in blue, lost or moved lines in red.
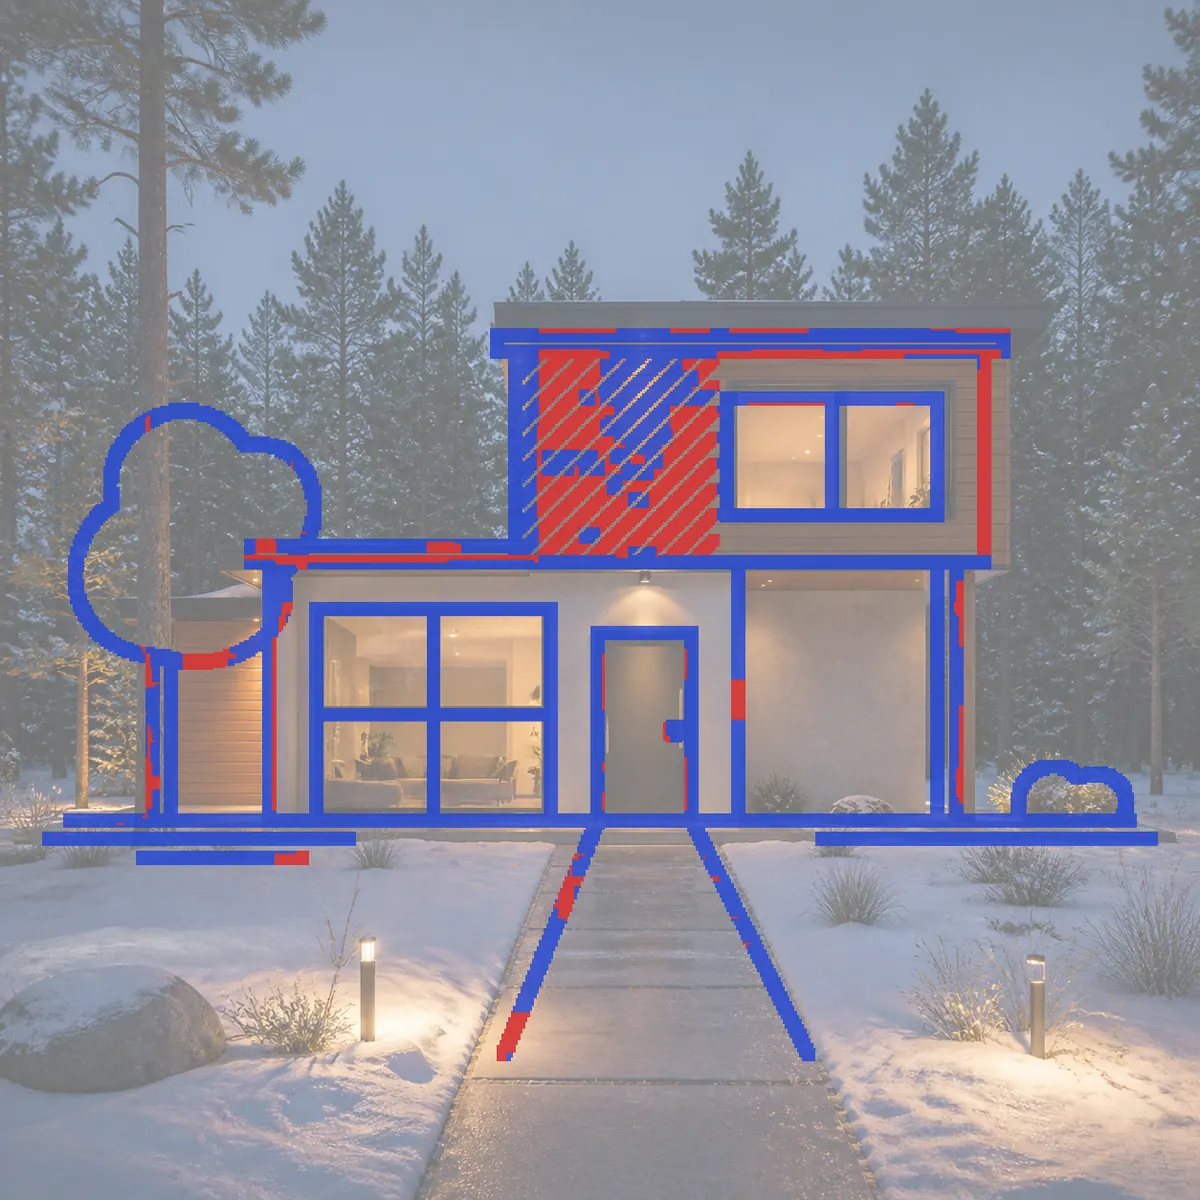
This render kept 82%. The red sits almost entirely inside the hatched upper block: the diagonal hatching became horizontal cedar boards, so those pencil strokes have no matching edge. That is the render doing what was asked. The door, the windows, the roof edges, the path and the outline of the tree are blue.
The score is a measure, not a promise, and it is not a grade. A faithful product render can land around 50% because shading replaces pencil lines, and an interior sketch full of perspective lines scores lower than a house. Read the red lines, not only the number. Does AI rendering keep your design? walks through four real overlays, including the ones that score low for honest reasons, and the tutorial's line check section shows where the line check sits.
The five subjects and how light and camera differ
When you render, you pick a subject or leave it on "Choose for me", which goes by what your image shows first and the words you typed second. Each subject brings its own photographic habits, which is why the same few words land differently on a house and on a chair.
Building exterior
Shot like architectural photography: verticals kept straight, as a shift lens would, materials at a believable scale with some weathering, a site grounded with paving and planting, and natural daylight with soft shadows unless you ask for something else.
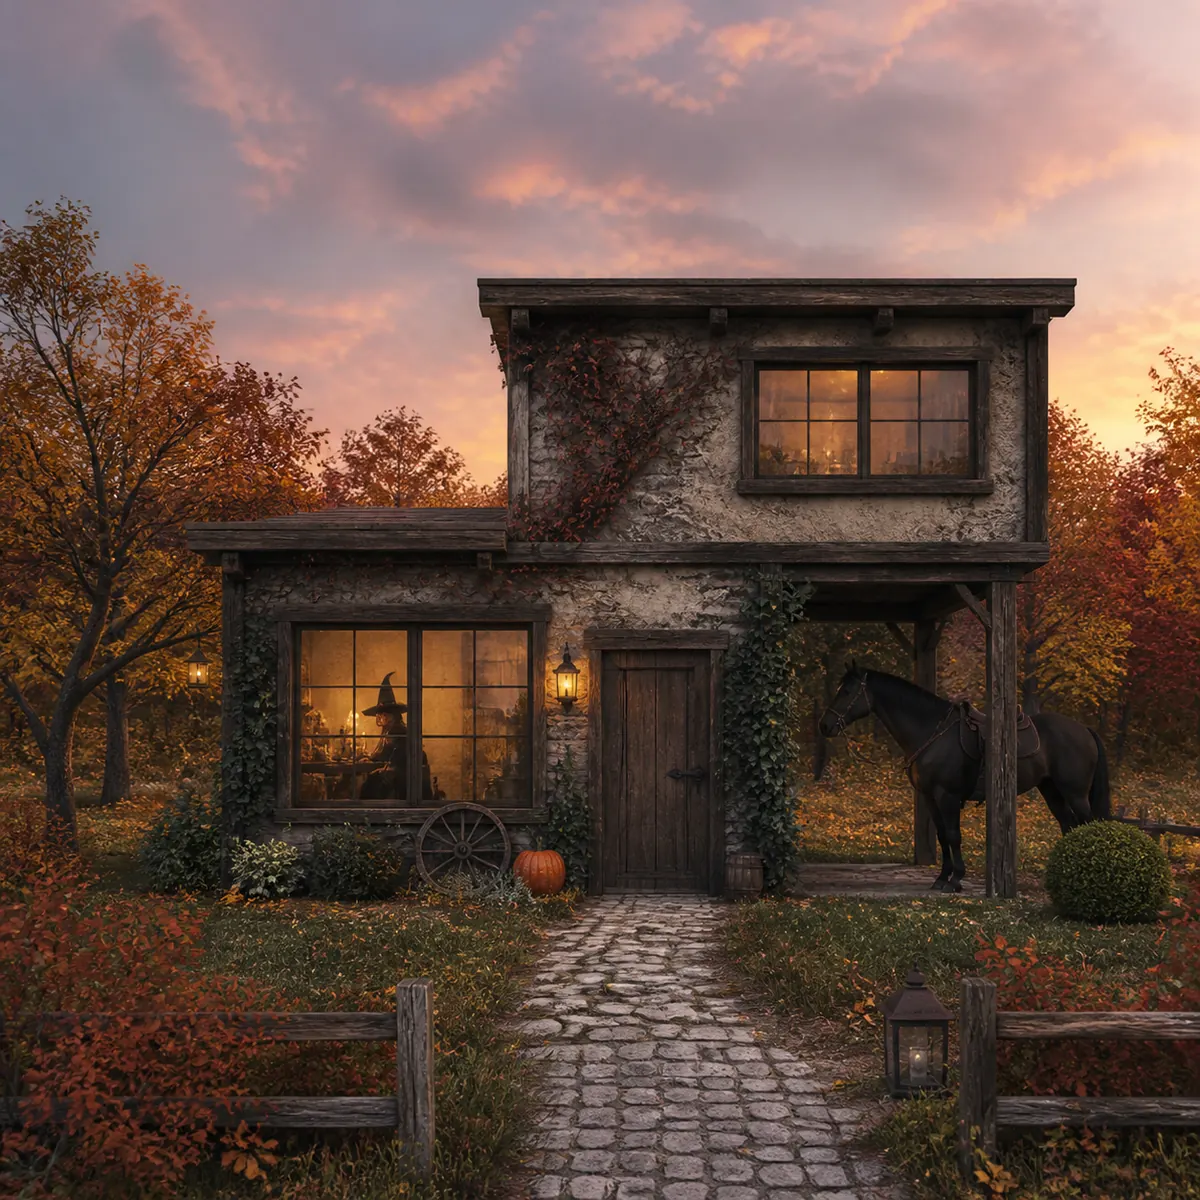
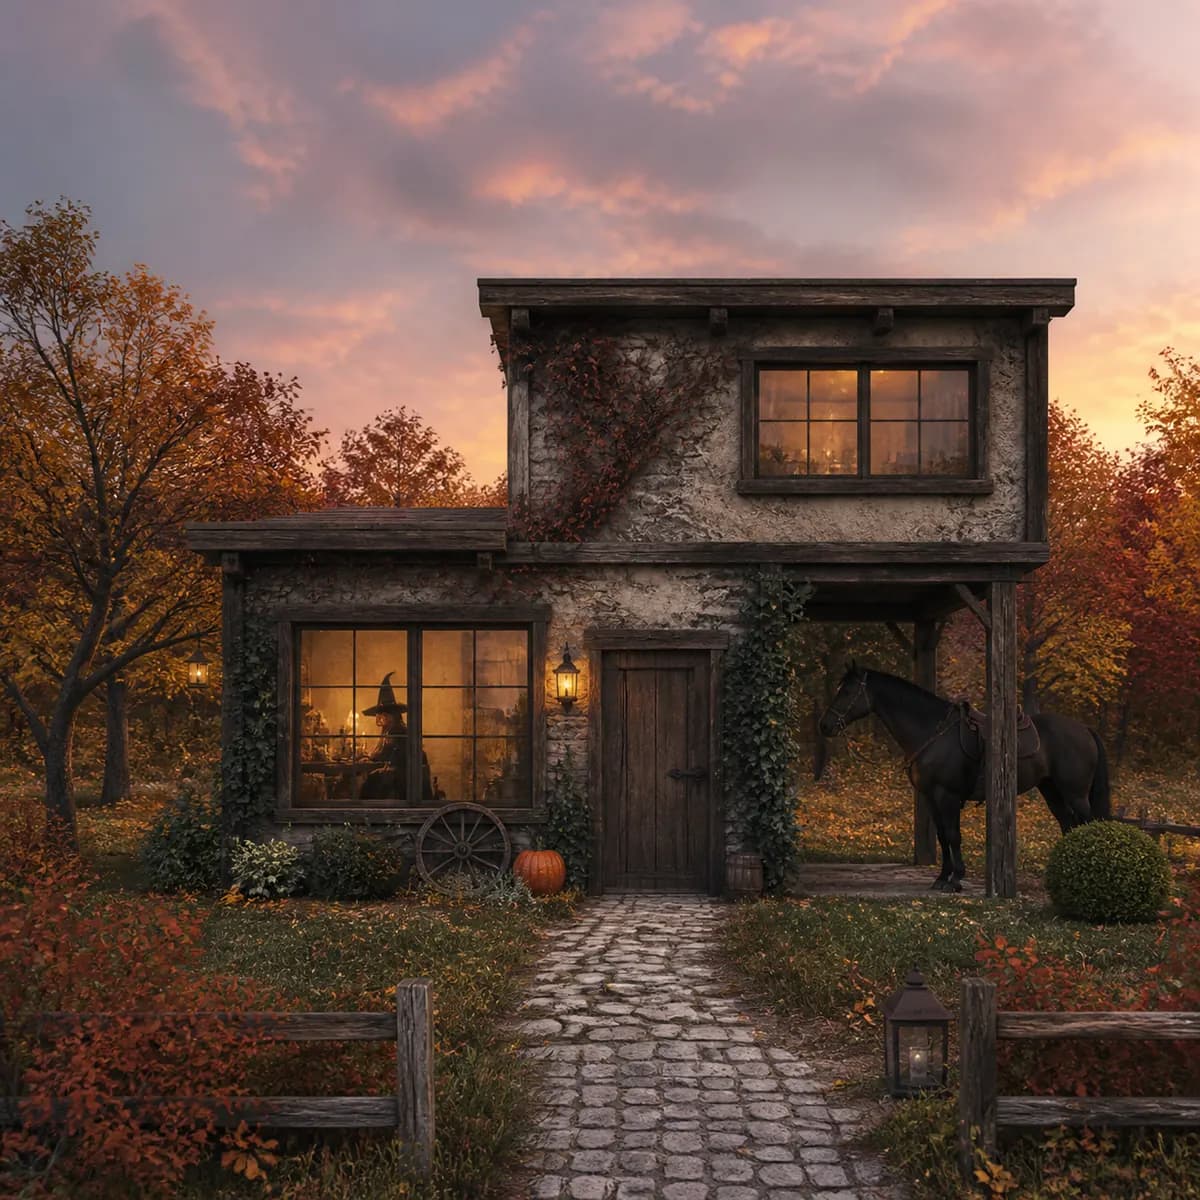
This is the same sketch as the night house. The prompt asked for a medieval cottage at dusk with a horse, a pumpkin and a witch at the window, and the style changed completely. The massing, the openings and the roofline did not, and the line check kept 89%.
Interior
Eye level, a moderately wide lens and a level horizon. Daylight from the windows mixed with warm lamps, honest texture in wood grain, fabric and stone, and a room styled as lived in, without clutter.
Interior design AI renders from a sketch or a photo goes further, including swapping a floor in place.
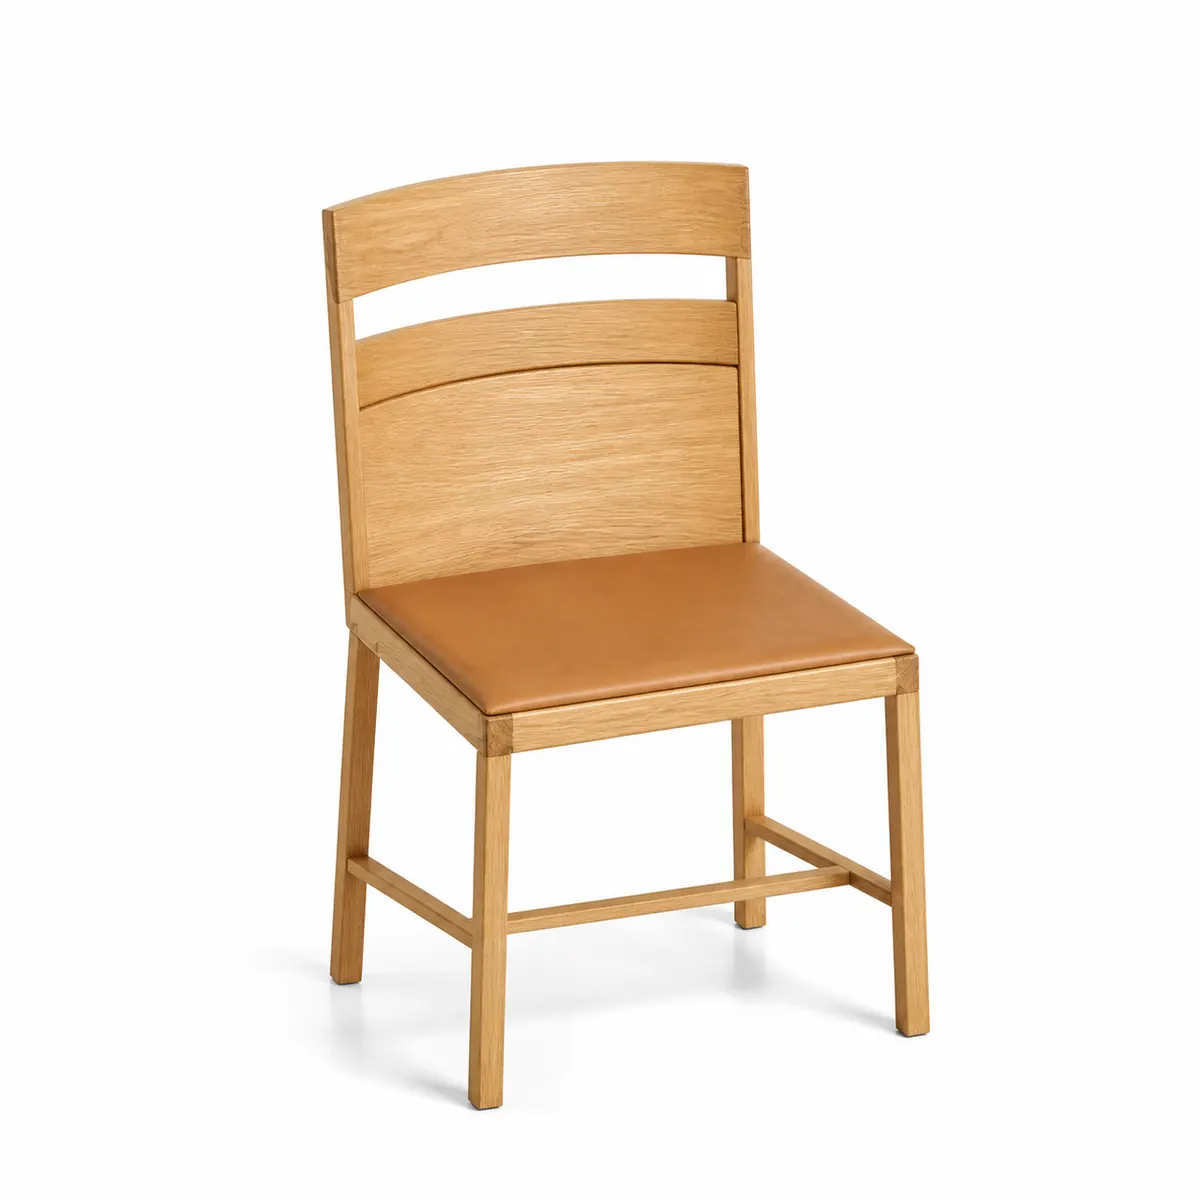
Product
A studio shot on a seamless backdrop: a large soft key light, a gentle fill, a contact shadow that anchors the object, crisp edges and no props competing with it.
Vehicle
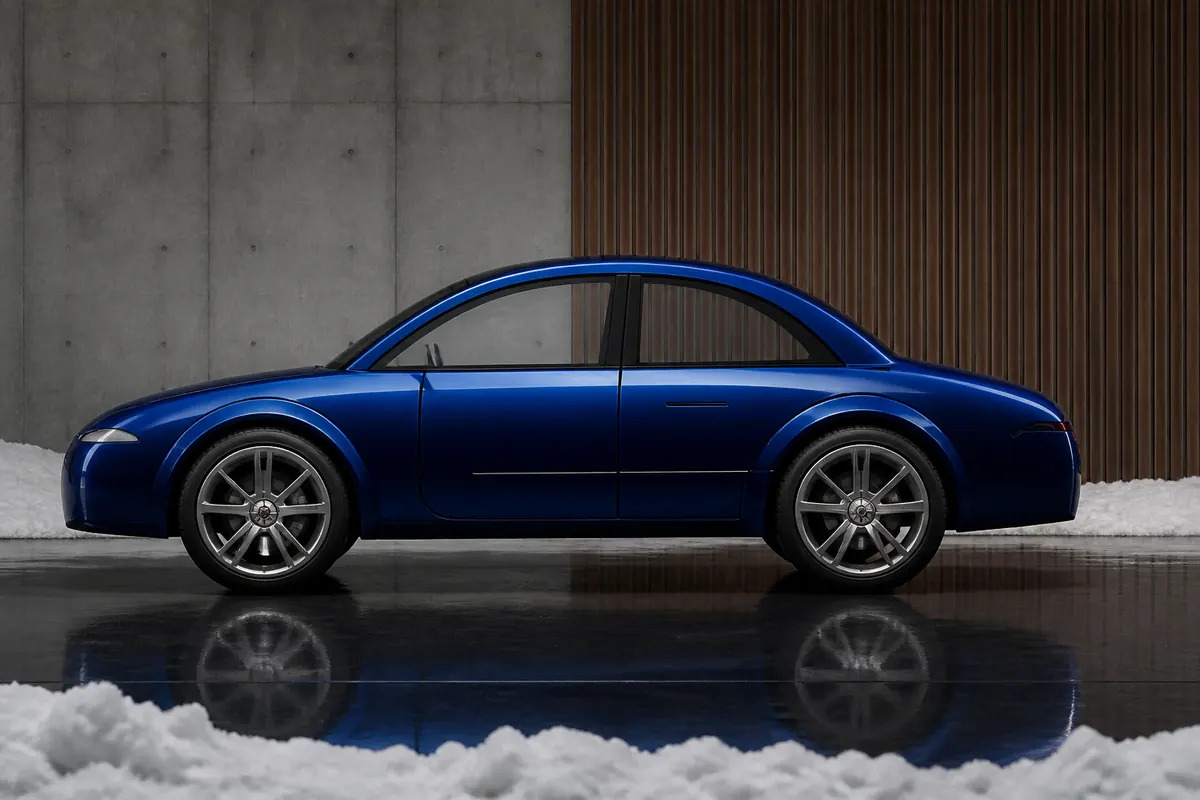
A low camera, a long lens, long clean reflections in the paint, crisp panel gaps, wheels and glass, and a floor that faintly reflects the car. The subject leans toward a three-quarter view, but your drawing sets the angle: this side-view sketch stayed side-on.
Landscape
Soft morning or late-afternoon light, plants chosen to suit one climate and layered by height, and paths and edges that read as built and maintained.
Writing the description
The sketch already says what shape things are. The description's job is everything the sketch cannot say: materials, light, setting and mood. One or two sentences is usually enough.
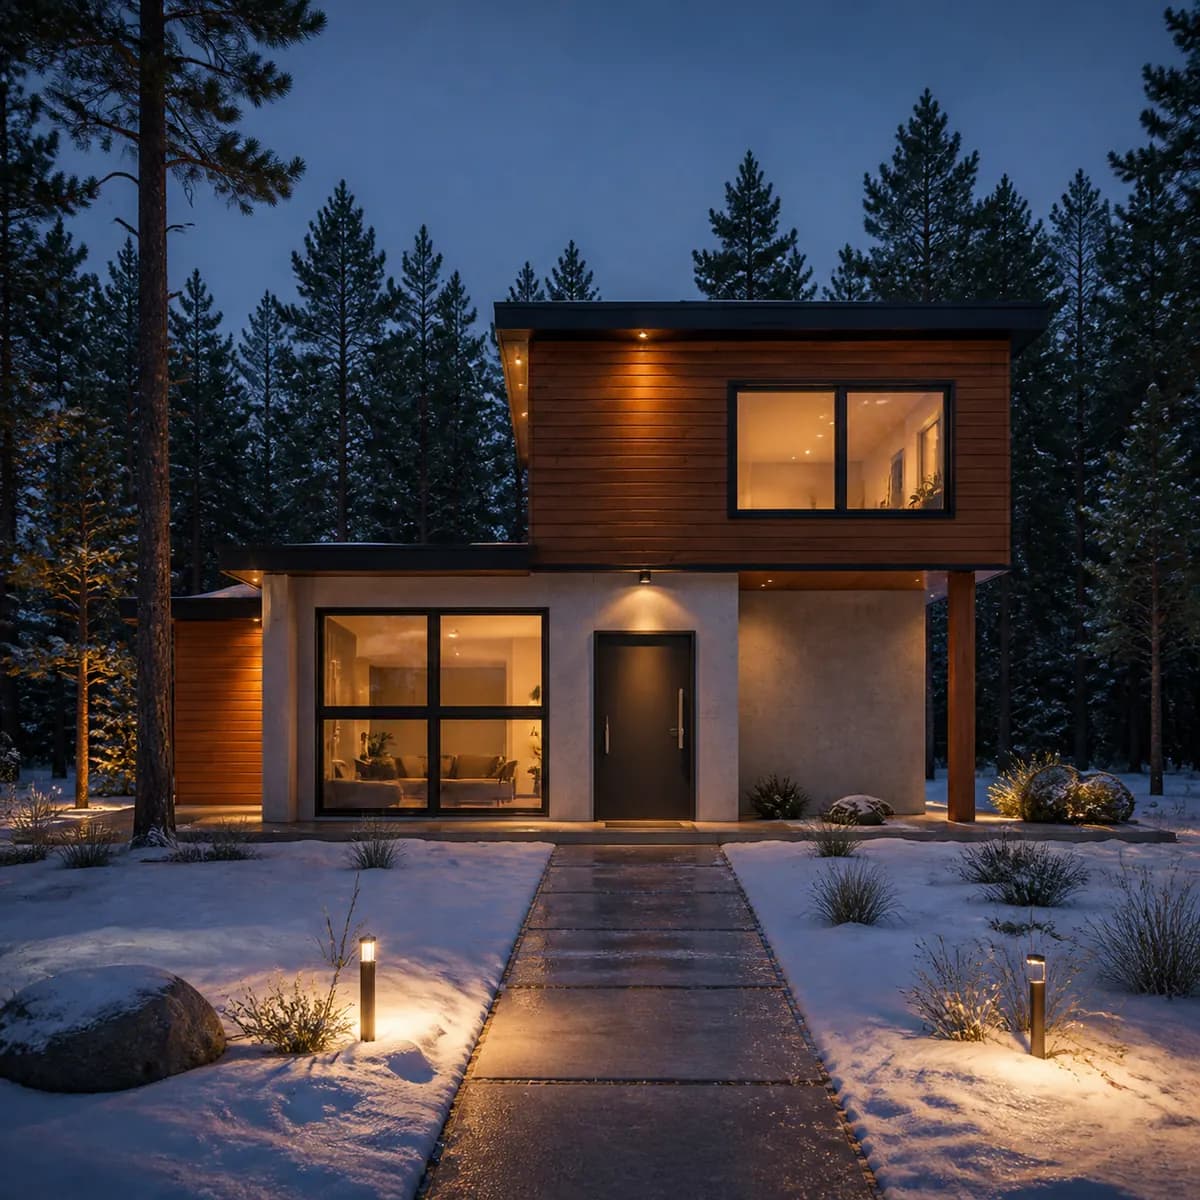
The night house carries a lesson. Its prompt was:
Cedar cladding and pale concrete, large glass, late afternoon sun, pine forest behind, night, lights on inside, snow on the ground
That asks for late-afternoon sun and night in the same breath, because idea chips were added on top of the sample description. The model had to choose, and it chose night. Nothing broke, but if you want golden hour, say golden hour once and leave it there. Words with no obvious place also end up somewhere: the car's "oak and concrete" became the wall behind it.
Habits that help:
- Name materials the way a builder would: "standing-seam zinc roof", "lime-washed brick", "white oak floor".
- Give one light condition and, if it matters, one kind of weather.
- Describe the setting in a phrase: "pine forest behind", "terraced street", "white studio backdrop".
- Leave shapes out. "A two-story house with a flat roof" repeats what the drawing already says and invites the model to redraw it.
How to write a render prompt has vocabulary and example prompts for every subject.
Iterating safely: versions, reuse and changing one part
Rendering is a series of tries, and a new try should never cost you an earlier one.
Every prompt and edit is a new version. Nothing is overwritten. Change "night" to "overcast" and the new render sits beside the old one; open any version to go back to it.
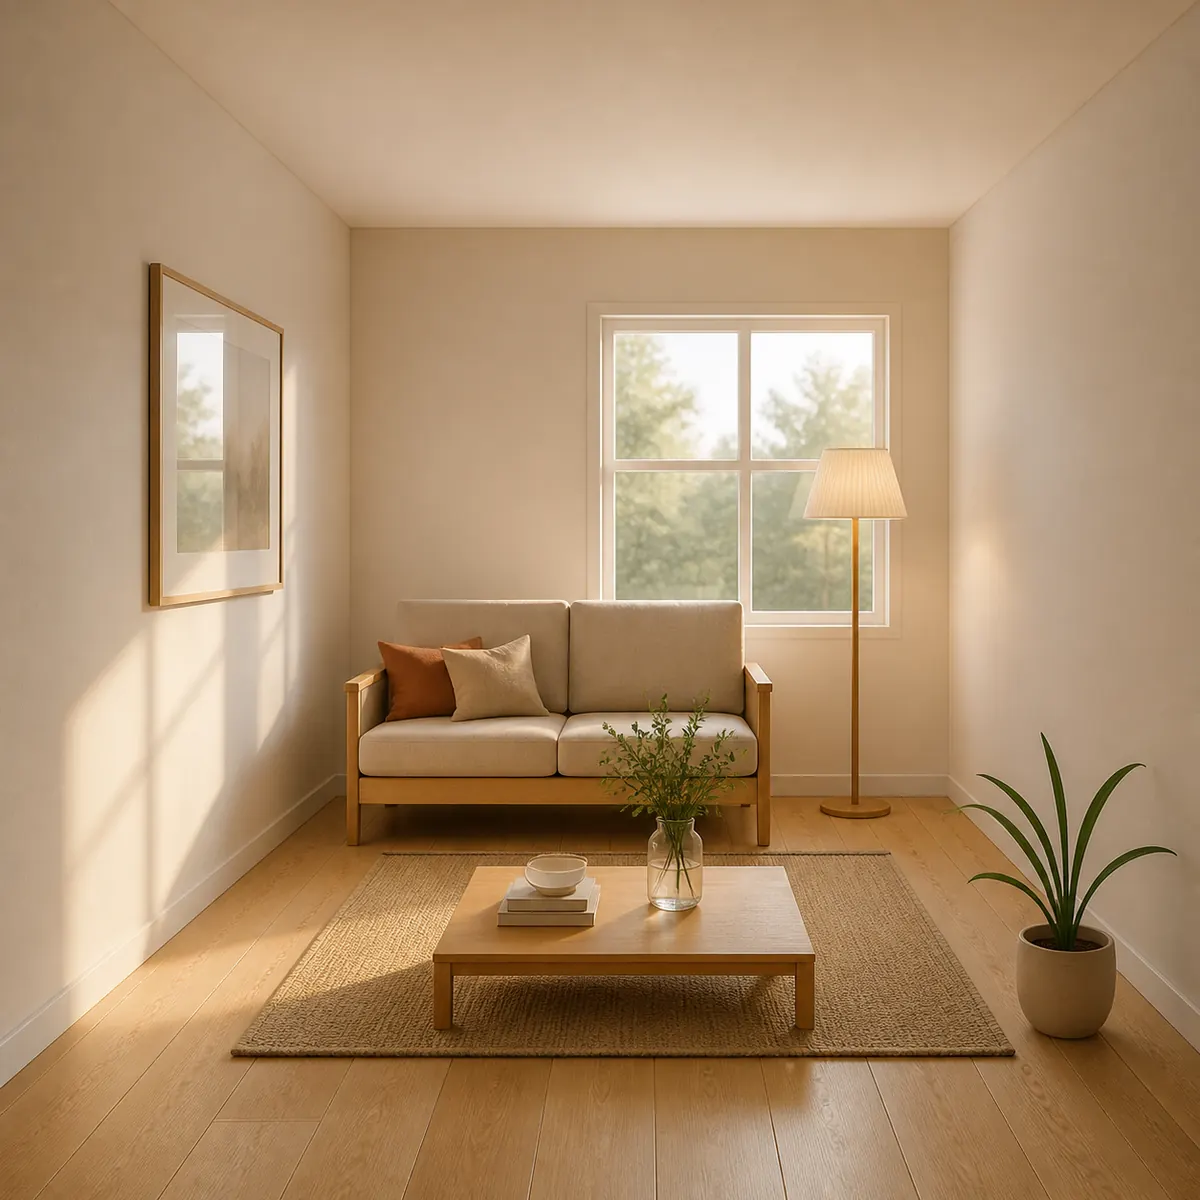
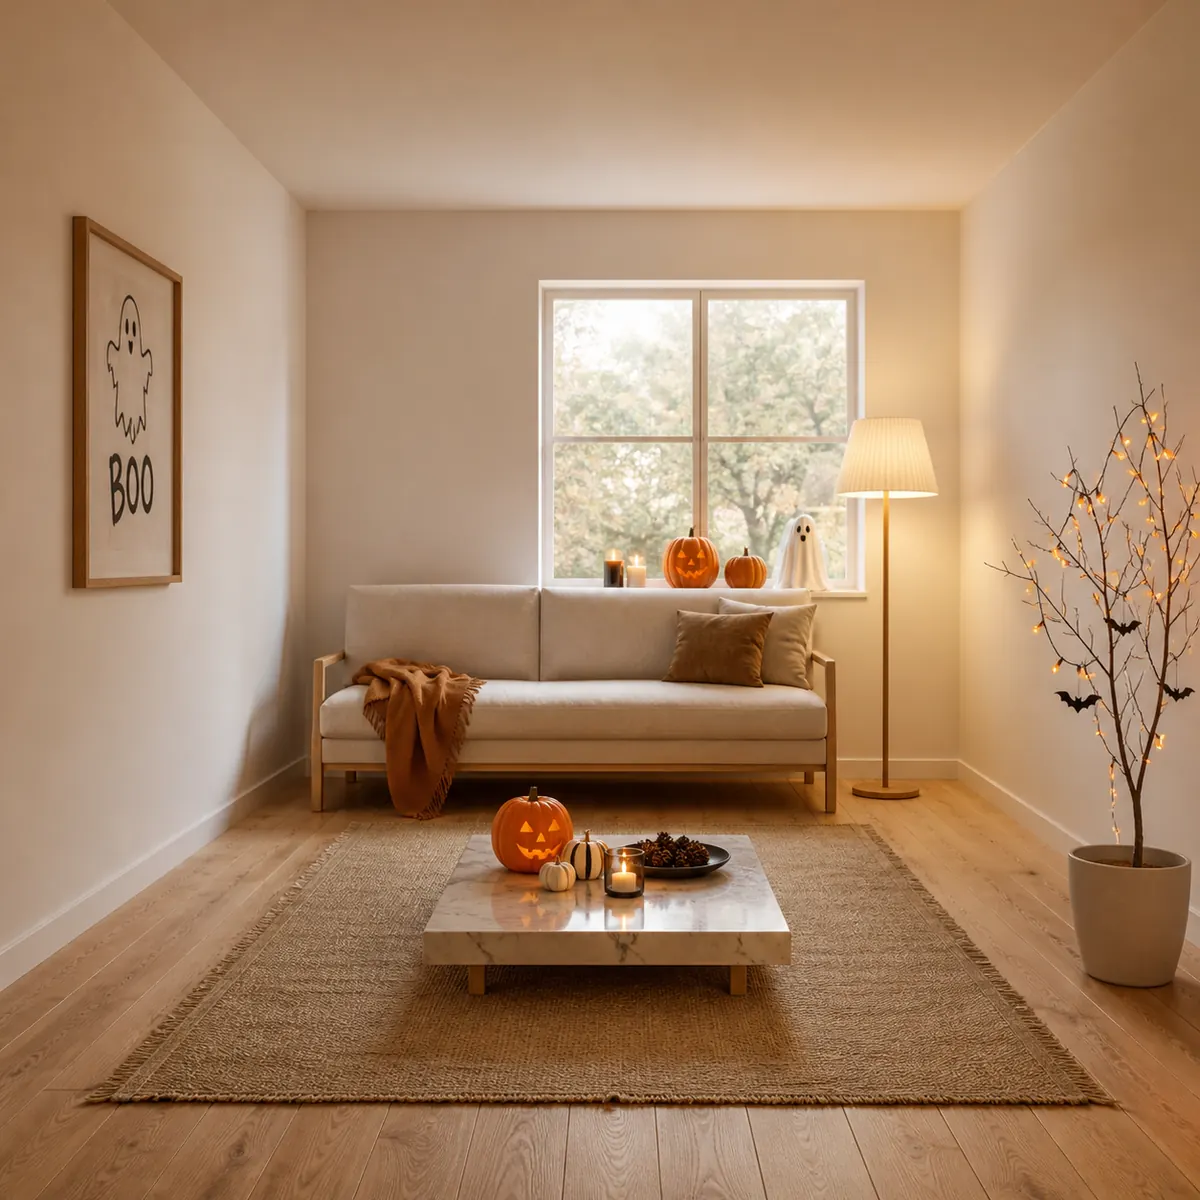
A follow-up message in the same design renders the same drawing with your new words, so you can try another scheme without uploading anything. The room below is a second version from the same living-room sketch as the Scandinavian one, with two words added to the prompt. The sofa, window, rug and table stay where they were; the styling moved on.
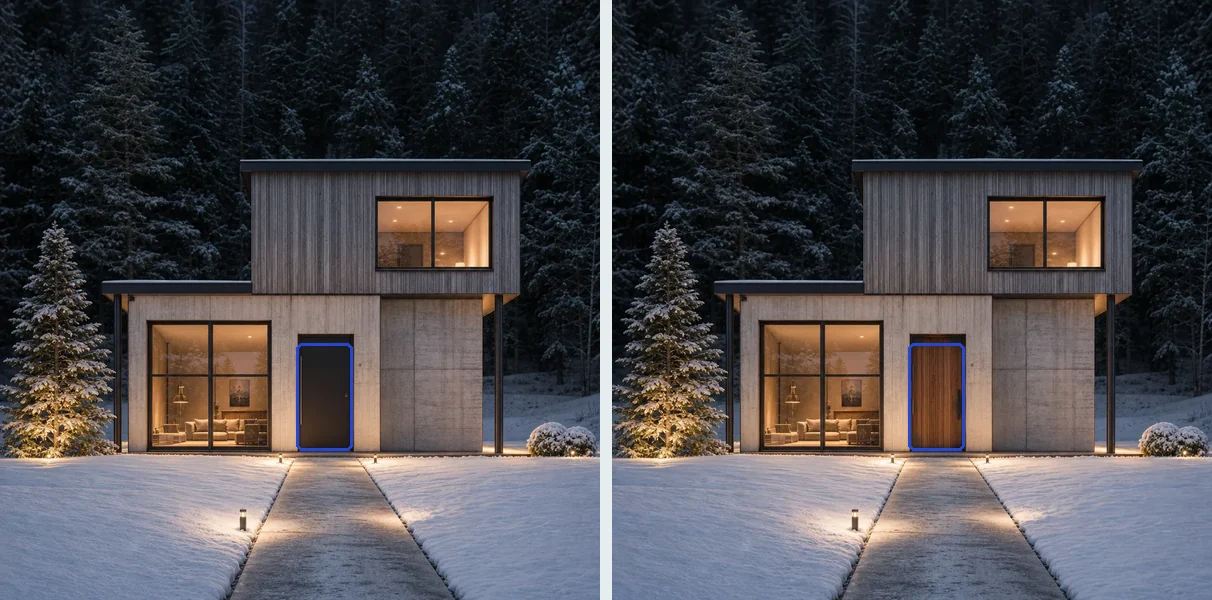
"Change just this" is for a render that is right except for one part. Brush over that part of the render, say what it should become in a few words ("oak floor", "red oak front door"), and only the area around your marks is redrawn; the rest of the image is copied back untouched. To add something, one mark where it should stand is enough: ask for "a person grilling" on the terrace and the figure is drawn whole, even past your mark. A brush edit costs 5 credits, the same as a render.
Crop & colour handles crop, rotate, flip, brightness, contrast, saturation and warmth. It uses no AI, costs nothing, and saves its result as a new version too.
When a version is right, download it or email the full-size image to yourself. If you want to try all of this on a drawing of your own, open the studio beside this page.
What AI rendering cannot do yet
Knowing where the tool stops saves you from asking it for the wrong job.
- Plans, sections and technical drawings. It makes pictures, not drawings. Do not expect a measured plan or section to come back.
- Construction detail. Flashings, junctions and how the cladding turns a corner will look believable, but they are invented. Do not use a render to resolve or communicate a detail.
- Particular plant species. Landscape renders choose plants that suit a climate. The species are approximate, so the render illustrates a planting plan; it does not specify one.
- Specific products. Ask for a particular designer chair or faucet and you get one in that spirit, not the catalog item. Furniture and fittings are representative.
- Dimensions. A render keeps proportion from your drawing; it does not know your dimensions, and anything the sketch leaves vague it will guess.
- Faint lines and tiny details. A light, thin pencil line can be read as nothing at all. Darken what matters before you photograph the sketch.
- Anything beyond a still image. No 3D model and no animation. (Paid plans and packs can download a render in 4K for print.)
Photos whose main subject is a person are refused; Inkfinish renders designs and spaces, not people.
What a render costs
Every render or "Change just this" edit costs 5 credits. Crop & colour is free.
| Free | Standard | Pro | |
|---|---|---|---|
| Price | $0 | $15 a month | $45 a month |
| Credits | 15 to start, with a Google sign-in | 800 a month | 3,000 a month |
| Renders | 3 to start | 160 a month | 600 a month |
| Cost per render | - | about $0.09 | about $0.08 |
| Watermark | Yes | No | No |
Sign in with a Google account and your first 3 renders are free. Free renders carry a watermark: the Inkfinish mark across the middle of the image, as below.
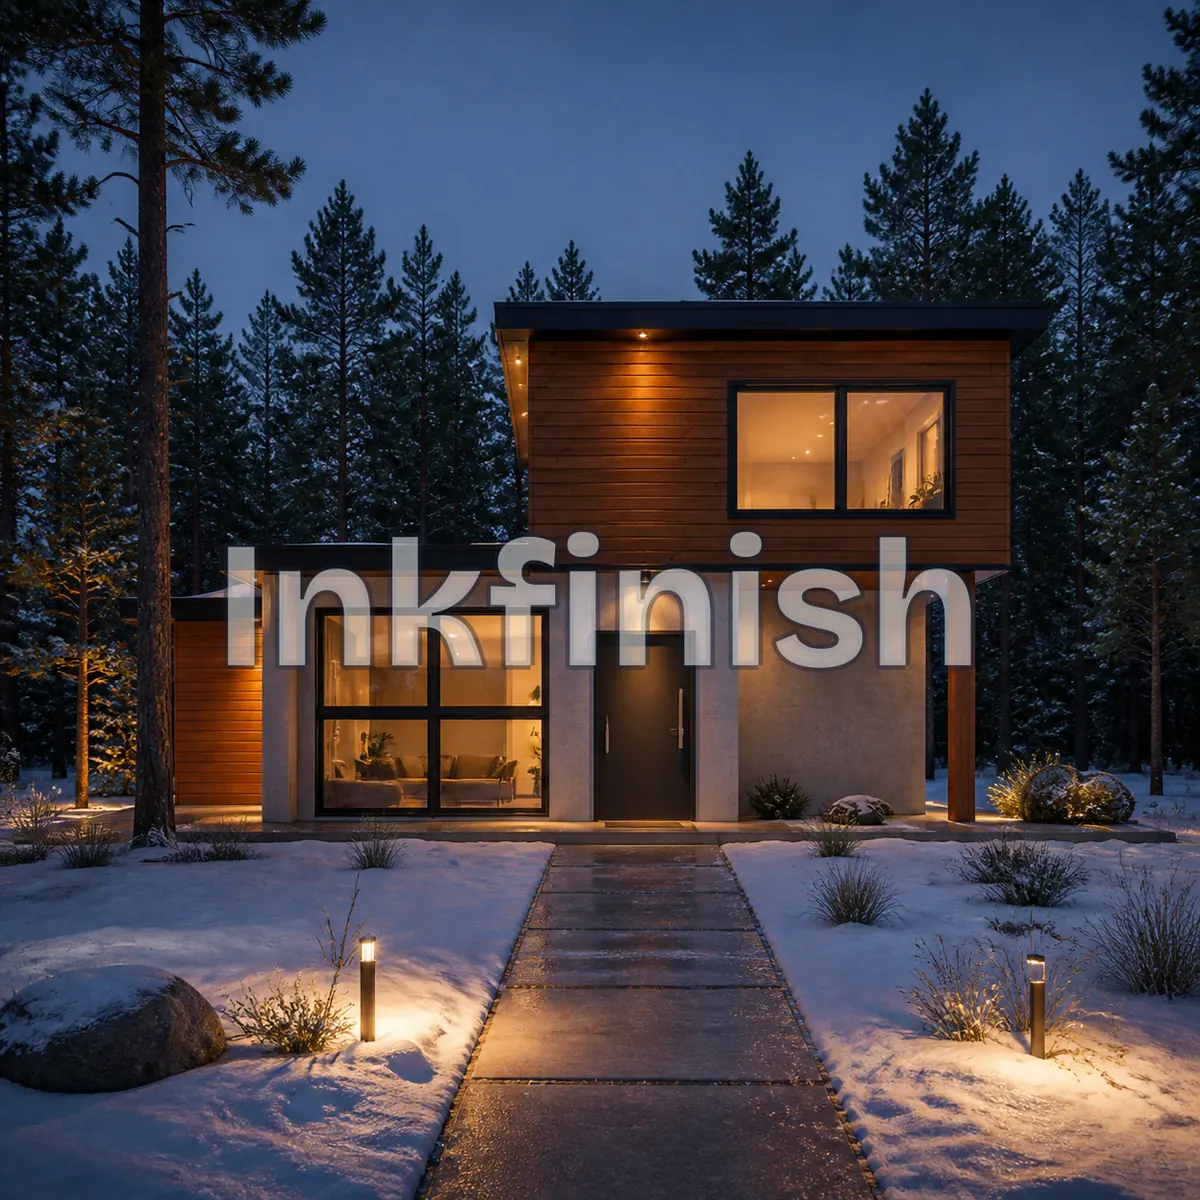
Failed renders are refunded. Paid credits reset each month, and you can cancel any time. Prices are in US dollars before tax, and Stripe handles payment. The pricing page has the details, and if you are at school, AI rendering for architecture students covers how far the free renders go.
Questions people ask
Is sketch to render AI free to try?
Yes. Sign in with a Google account and your first 3 renders are free. Free renders carry a watermark. After that, Standard is $15 a month for 160 renders.
Do free renders have a watermark?
Yes, the Inkfinish mark sits across the image. Renders on Standard ($15 a month) and Pro ($45 a month) carry no mark.
Can I use it on my phone?
Yes. It runs in the browser with nothing to install, so you can photograph a sketch and upload it from the same phone. Sign-in is with Google only.
Does it keep my design?
It is built to keep your shapes and proportions and change only the finish, and the line check shows you what it kept: a score plus an overlay with kept lines in blue and lost or moved ones in red. Read the overlay rather than trusting any single number.
What file types can I upload?
PNG, JPEG or WebP, up to 10 MB: a photo of a sketch, a tablet drawing, a 3D-model screenshot or a photo of the real thing.
The quickest way to judge any of this is on a drawing you know well, because you will spot a moved window before any score does. Sign in and render your first sketch free.