Free Virtual Staging: Stage a Listing Photo With AI
By Inkfinish · · 7 min read
 Staged
 Empty
EmptyAn empty room photographs badly. It looks smaller than it is, it gives buyers nothing to picture themselves in, and in a listing grid it is the photo people scroll past. Virtual staging fixes that by adding furniture to the photo instead of the room.
This guide shows how to stage a listing photo with AI, free to try, and how to do it so the result is honest: the room still the room, the photo labelled, the original kept. It covers an empty room, a lived-in room that has to be emptied first, the six staging styles, how to check nothing about the property changed, and what listing rules generally ask.
How to virtually stage a room with AI
- Photograph the room from a corner or doorway, camera level, lights on.
- Upload it to the studio. Sign in with a Google account and your first 3 renders are free.
- If it is furnished, empty it first with one message (see below).
- Ask for staging in one style, and say that the room itself must stay as photographed.
- Check the result against the original, fix one piece if needed, and post it labelled.
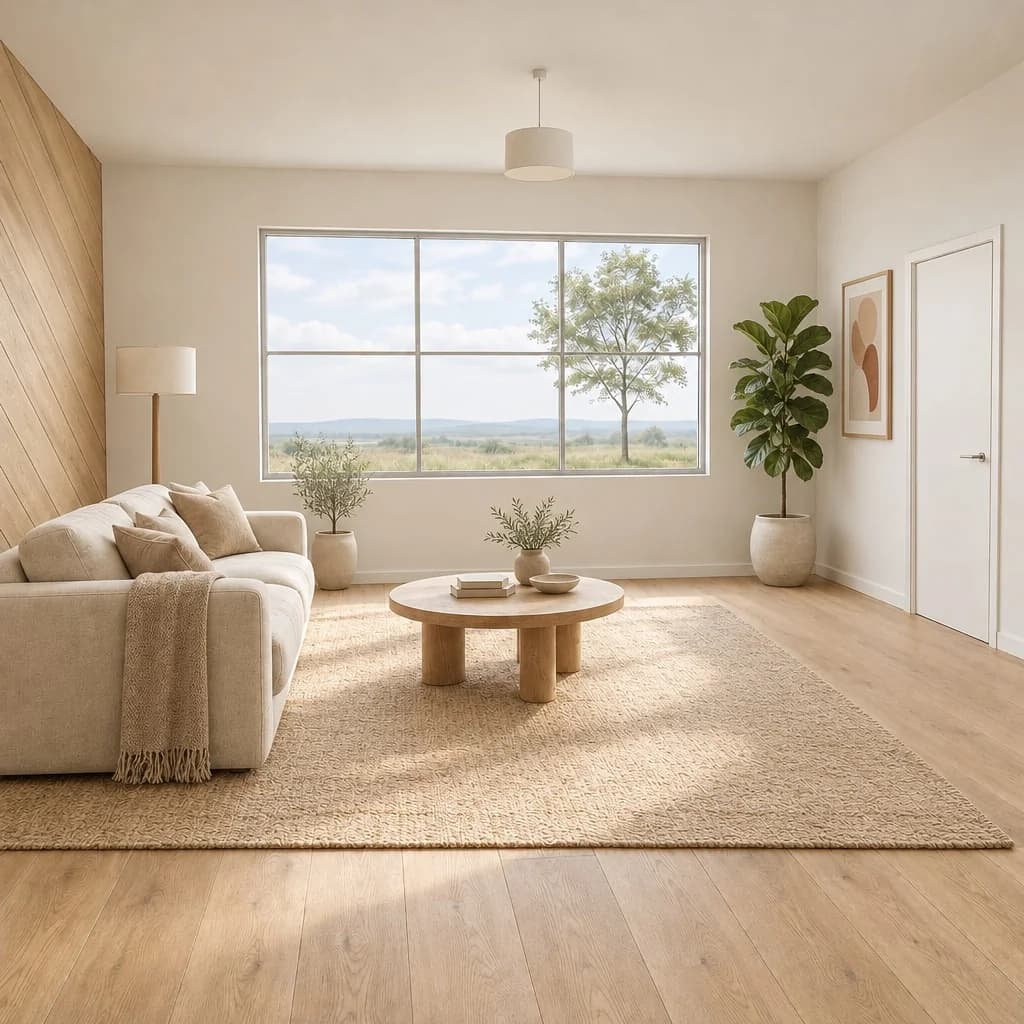
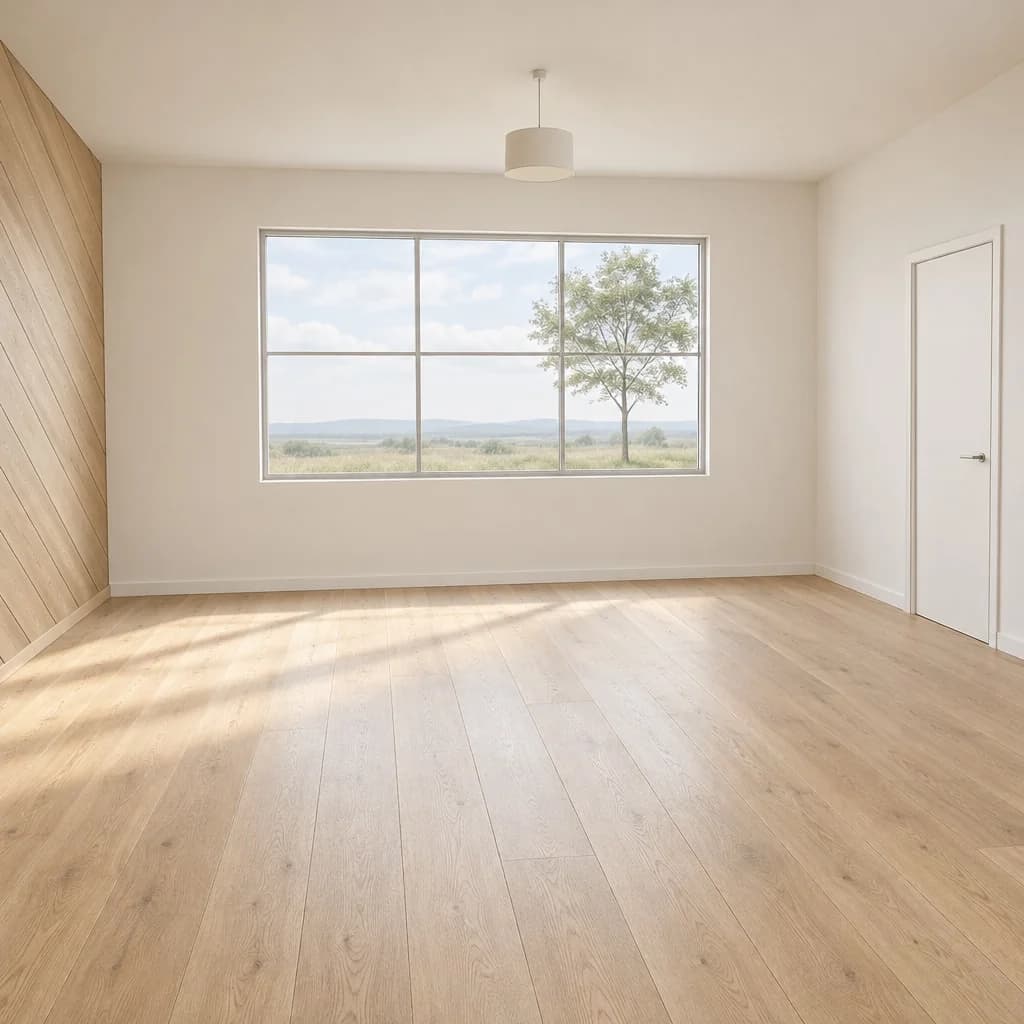
The example at the top of this page is an empty room with white walls and a light oak floor, staged in the Modern style. The rug, sofa, coffee table, lamp and plants are new; the walls, floor, window and door are the room's own.
The words to type
The staging words do two jobs: say what to add, and forbid changing the property. These are the words a listing batch sends with every photo, with the style at the end:
Virtually stage this real estate listing photo. Add furniture and decor that fit the room's purpose and scale. Keep the room itself exactly as photographed: the same walls, floors, ceiling, windows, doors, built-in fixtures, lighting from the windows, and the view outside. Do not move, add or remove any wall, window or door. Photorealistic.
Then add the style, such as "Style: light oak furniture, white and soft grey textiles, wool throws, simple pendant lights." Anything specific goes on the end too: "a home office in the small bedroom", "no rug on the hardwood".
Six staging styles
One room can be staged in very different directions. These three came from the same empty room as the top of this page, one message each:
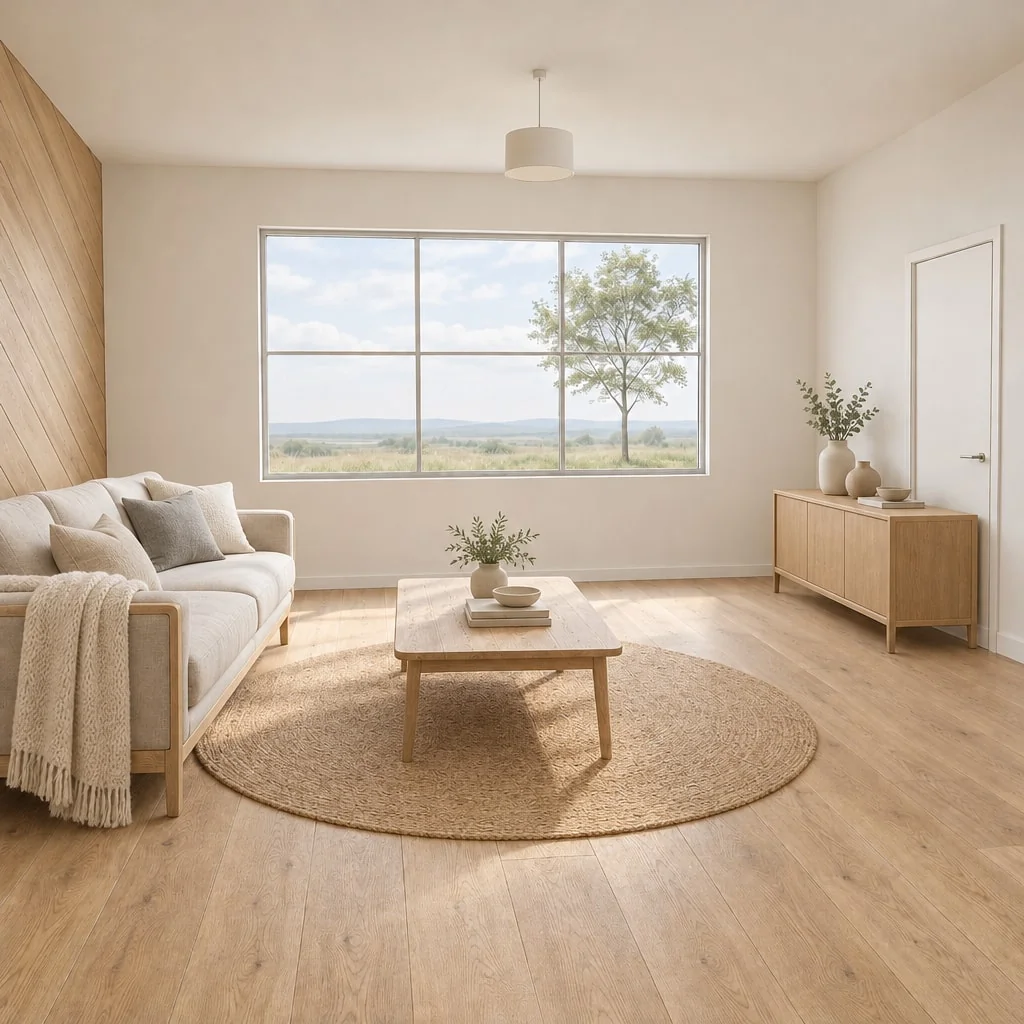
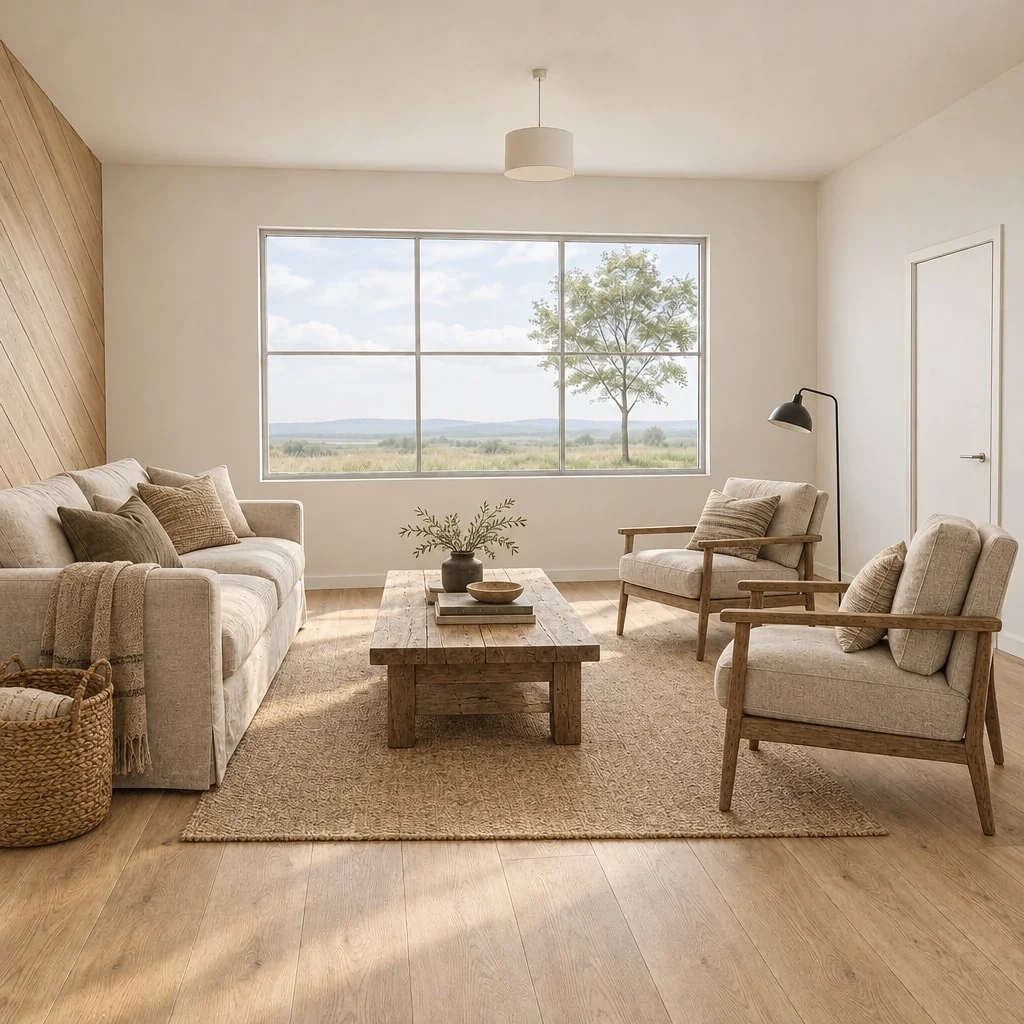
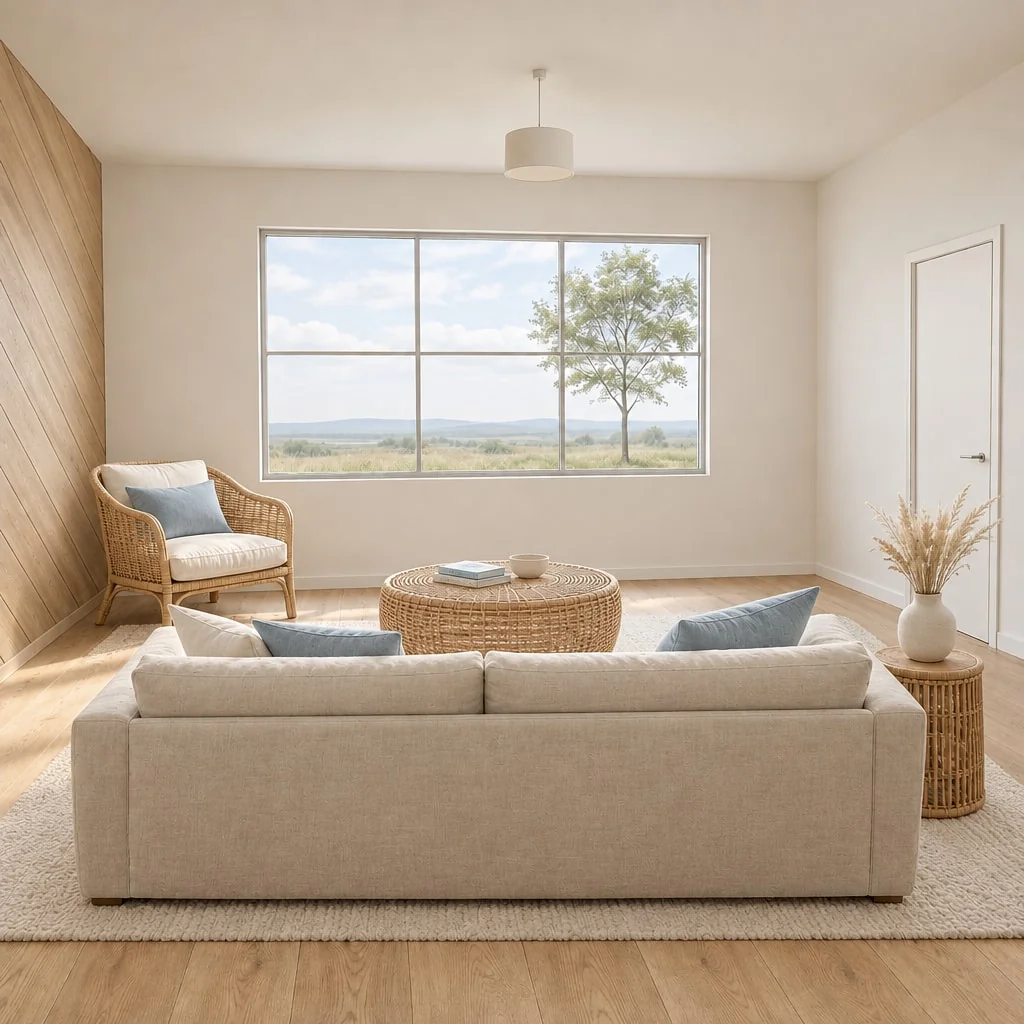
A listing batch offers six styles, each described to the image model in a few words:
| Style | What it adds |
|---|---|
| Modern | Modern furniture in warm neutrals, clean lines, a large rug, simple art and a few plants |
| Scandinavian | Light oak furniture, white and soft grey textiles, wool throws, simple pendant lights |
| Farmhouse | Rustic wood furniture, linen upholstery, woven baskets, black metal accents |
| Coastal | Airy furniture in white, sand and soft blue, rattan accents, light linen |
| Mid-century | Mid-century modern furniture in walnut, tapered legs, mustard and teal accents |
| Luxury | Upscale furniture in velvet, marble and brass, layered lighting, a statement rug |
Pick the one that suits the buyers the home will attract, and use the same style for every room of a listing so the photos belong to one home.
Staging a lived-in room: empty it first
Most listings are not empty. Staging straight over someone's old sofa tends to leave pieces of it behind, so do it in two messages: empty the room, then stage the empty version.
Here is a lived-in living room, with a leather sofa, a cluttered coffee table, a TV stand, a patterned rug, toys and boxes:
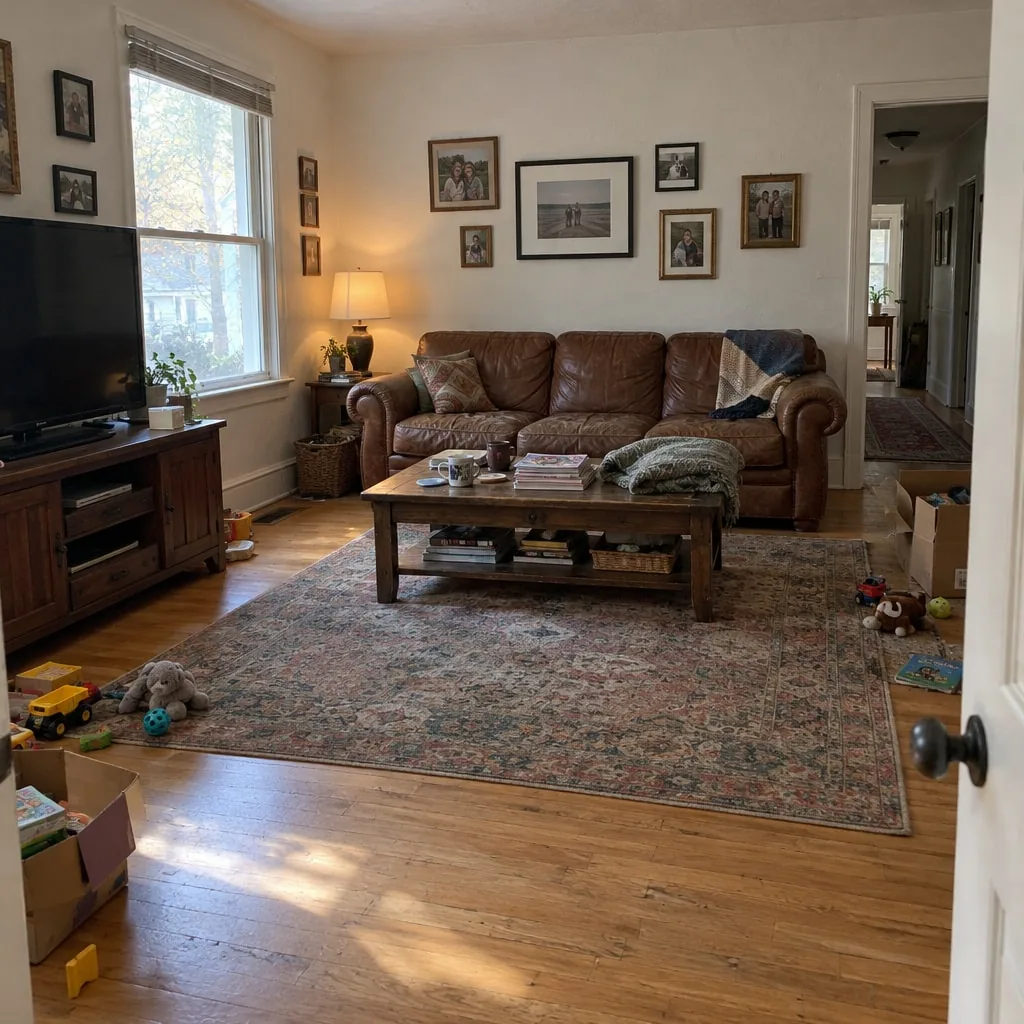
The first message is the same one the listing batch's Empty the rooms job sends:
Virtually empty this real estate listing photo. Remove all furniture, decor, rugs, clutter and personal items, and show the floor and walls that continue behind them. Keep the room itself exactly as photographed: the same walls, floors, ceiling, windows, doors, built-in fixtures and cabinets, lighting from the windows, and the view outside. Do not move, add or remove any wall, window or door. Photorealistic.
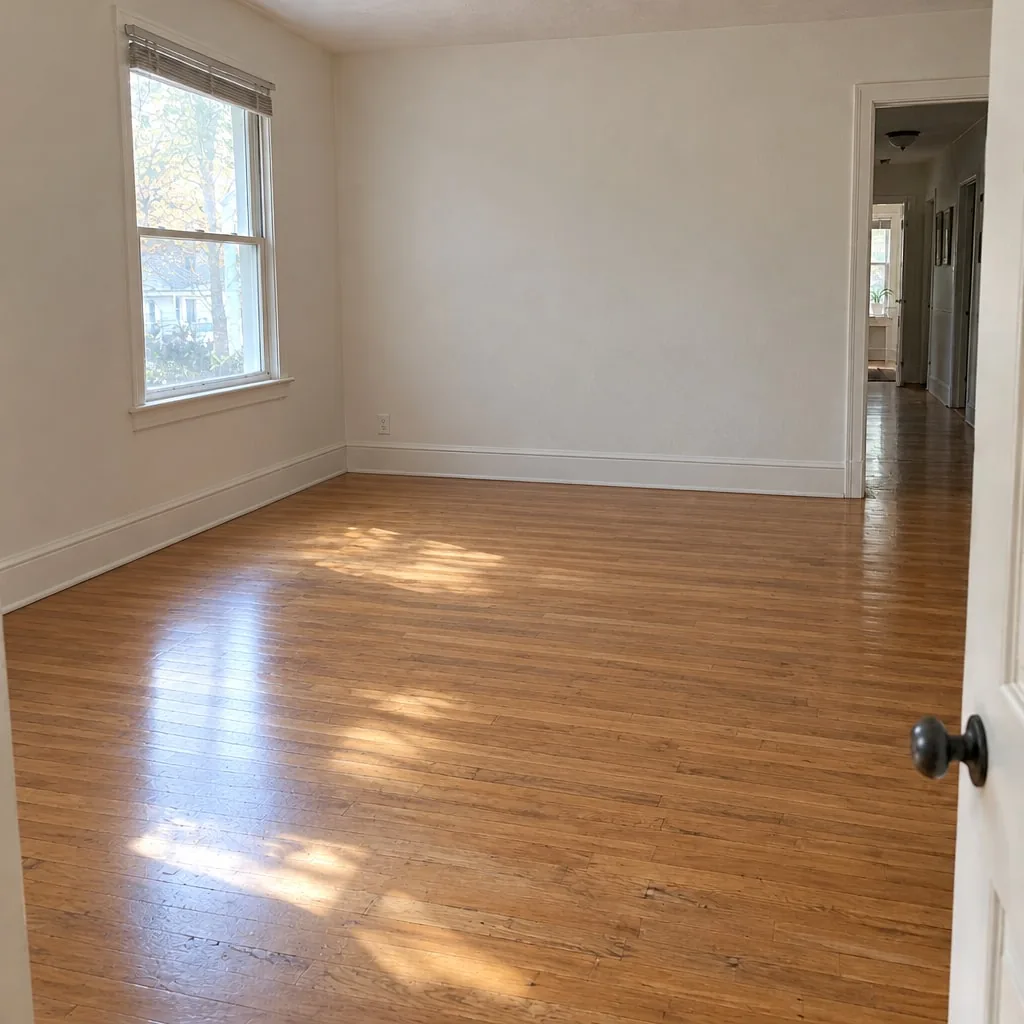
Then the staging words above, with the Scandinavian style:
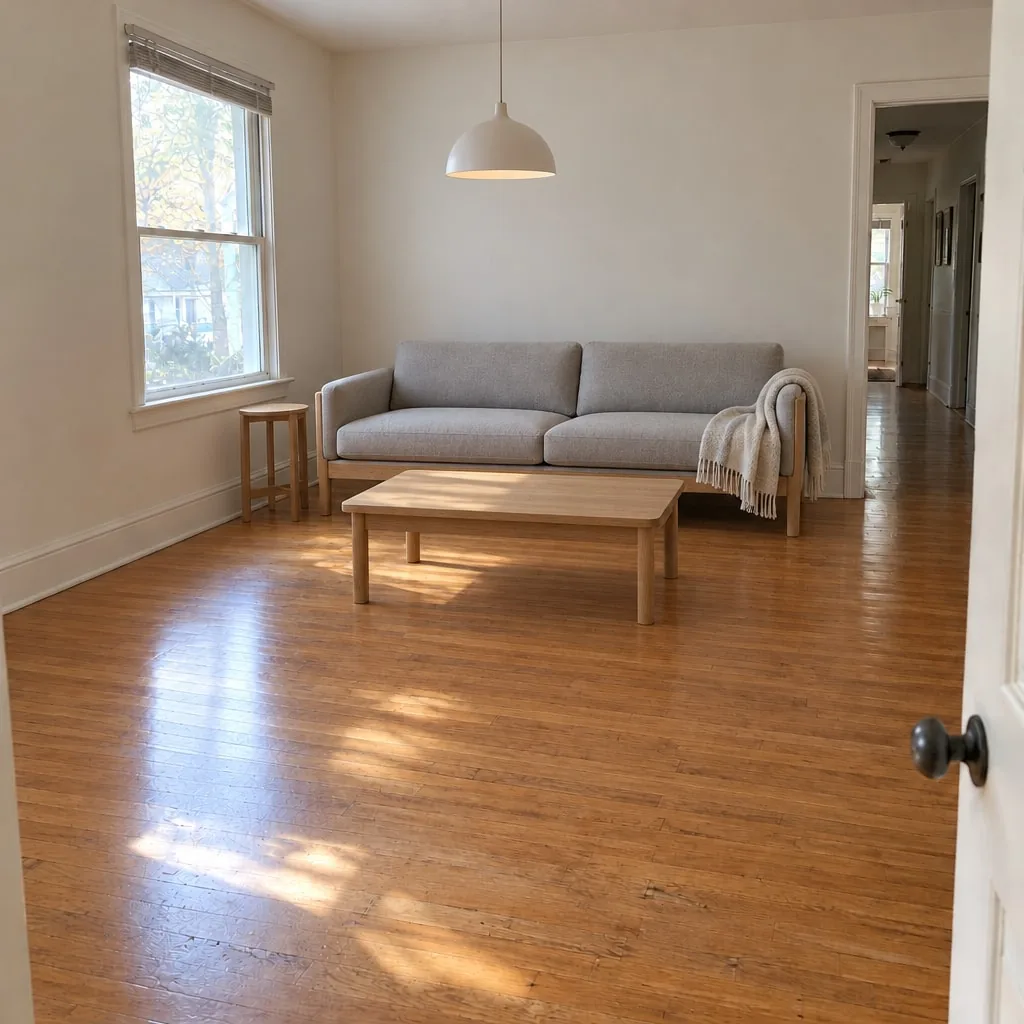
The window, the doorway and the oak floor stayed put through both steps. The table lamp went with the furniture, so that corner is lit by the window alone, and the staging came out sparer than the busy original. If you want more in the room, say so: "add a rug, a reading chair by the window and a plant".
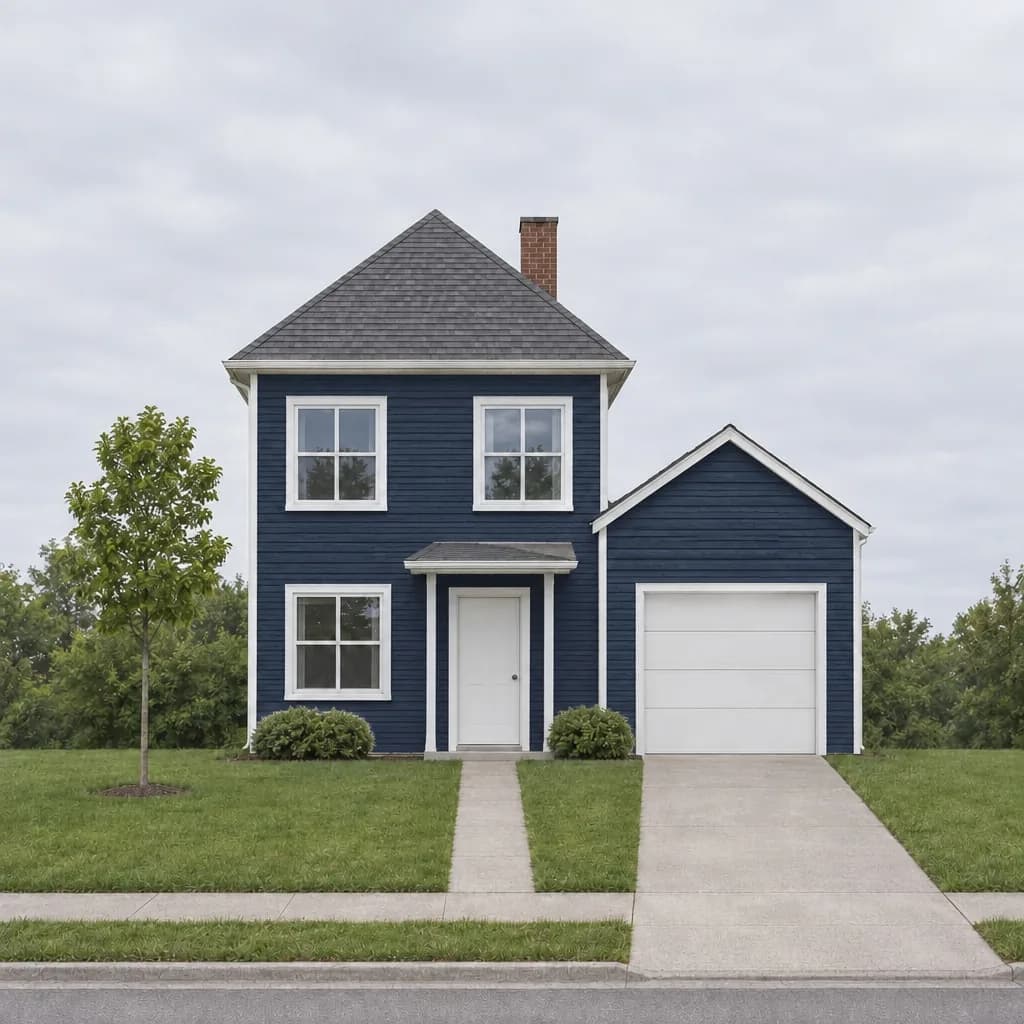
This room is not a real address: we made the starting photo in Inkfinish so we could publish every step (the house in our exterior paint guide started as a sketch). A photo of a real listing works the same way. The empty step on its own is on our remove furniture page.
Check that the room did not change
Listing rules generally forbid changing the property: walls, floors, windows and views must stay as they are. So check every staged photo before you post it.
- Drag the compare handle across the result in the studio. Walls, windows, doors and the floor should line up exactly.
- Read the lines-kept score. For an uploaded photo, each render reports how much of the photo's lines it kept, and Show lines draws them: blue where kept, red where lost or moved.

Red under new furniture is expected, because a sofa covers the skirting board behind it. Red along a window frame or a wall edge is not.
- Fix one piece, not the room. If a chair is wrong, use Change just this: brush over it, say what it should be, and only that area is redrawn.
Labels, originals and the rules
California's AB 723, in force since January 1, 2026, asks for a clear disclosure on digitally altered listing photos and access to the unaltered one. MLS rules such as CRMLS's add the "virtually staged" wording and forbid changing the property itself. Together, rules like these generally ask for three things:
- A "virtually staged" label on the staged photo.
- The unaltered photo available alongside it.
- No changes to the property: walls, floors, windows and views as they are.
A listing batch does the first two for you: its ZIP holds every original next to its staged copy, labelled "Virtually staged" in the corner (you can change or clear the label). This is a summary, not legal advice. Rules differ by state and MLS and they change, so check your MLS's rules, and your broker, before posting staged photos. The real estate page covers the batch in more detail.
Staging a whole listing at once
One photo at a time suits a single room. For a listing, a batch takes up to 20 photos, stages them all in one style, gives each its own lines-kept score, and downloads one ZIP of originals and labelled copies. The same batch can also empty every room, turn exteriors to twilight or give them a blue sky. Batches run on paid credits, from a credit pack or a plan.
What it costs
Every staged photo is one render, 5 credits.
| Free | Standard | Pro | |
|---|---|---|---|
| Price | $0 | $15 a month | $45 a month |
| Renders | 3 to start | 160 a month | 600 a month |
| Cost per photo | - | about $0.09 | about $0.08 |
| Watermark | Yes | No | No |
Sign in with a Google account and your first 3 renders are free. Free renders carry a watermark, so they suit trying it out rather than a live listing. If you stage now and then, credit packs are paid once, from $19, and last six months. The pricing page has every option.
A few honest limits
- It redraws the photo. Always compare before posting; the lines-kept score helps, but your eye on the windows and walls is the final check.
- Furniture scale is a guess. The model judges room size from the photo. A wide-angle shot can make it choose furniture that is slightly too small.
- Disclosure is your call. Inkfinish gives you the label, the original and the score; whether a photo meets your MLS's rules is yours to decide.
The quickest way to see whether it works for your listings is to try one room. Open the studio and stage your first photo free.